How to Paddle Board: The Complete Beginner’s Guide to Standing, Paddling, and Falling Like a Pro
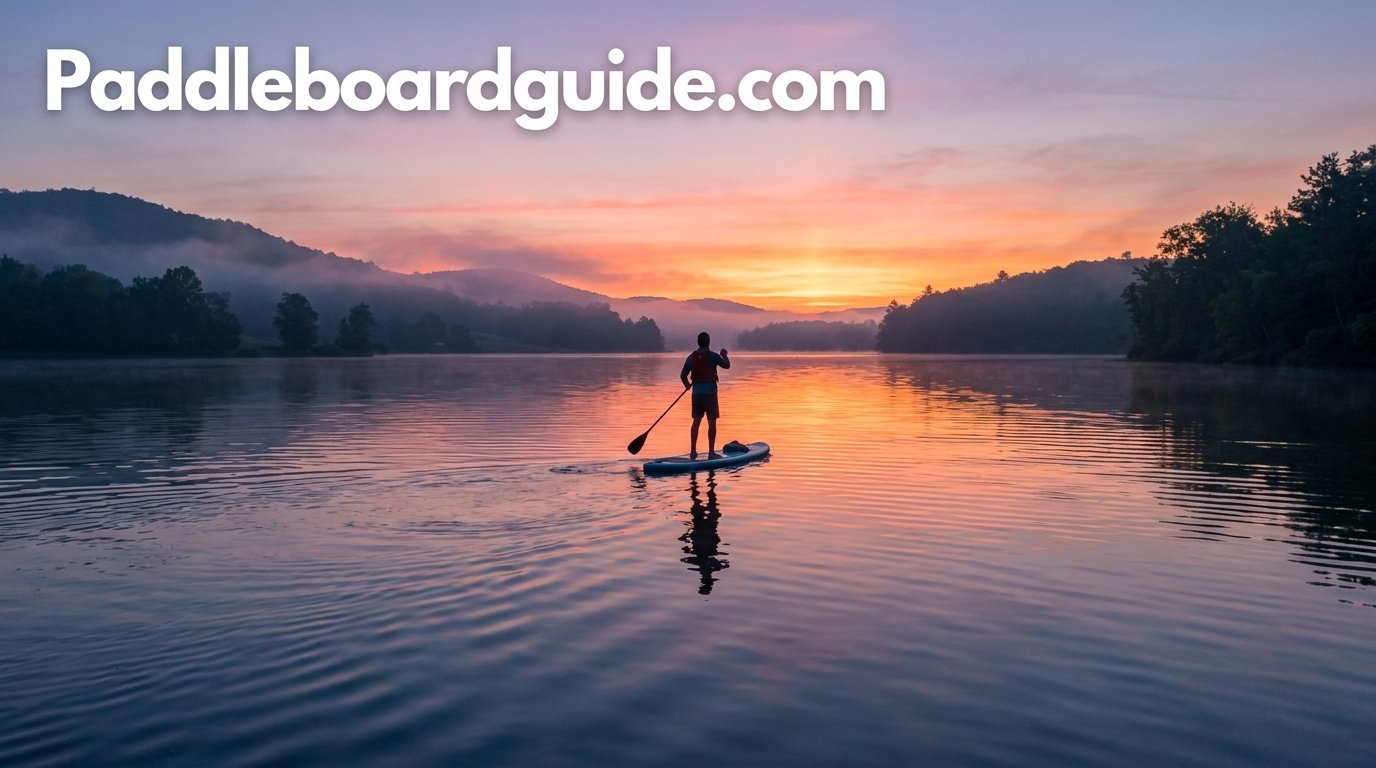
Stand-up paddle boarding looks effortless in photos, and honestly, once your body figures out the balance point, it is. This guide walks you through every stage — from picking your first board to carving turns on flat water — with visuals, step photos, and short videos for every step along the way.
1. What Paddle Boarding Actually Is
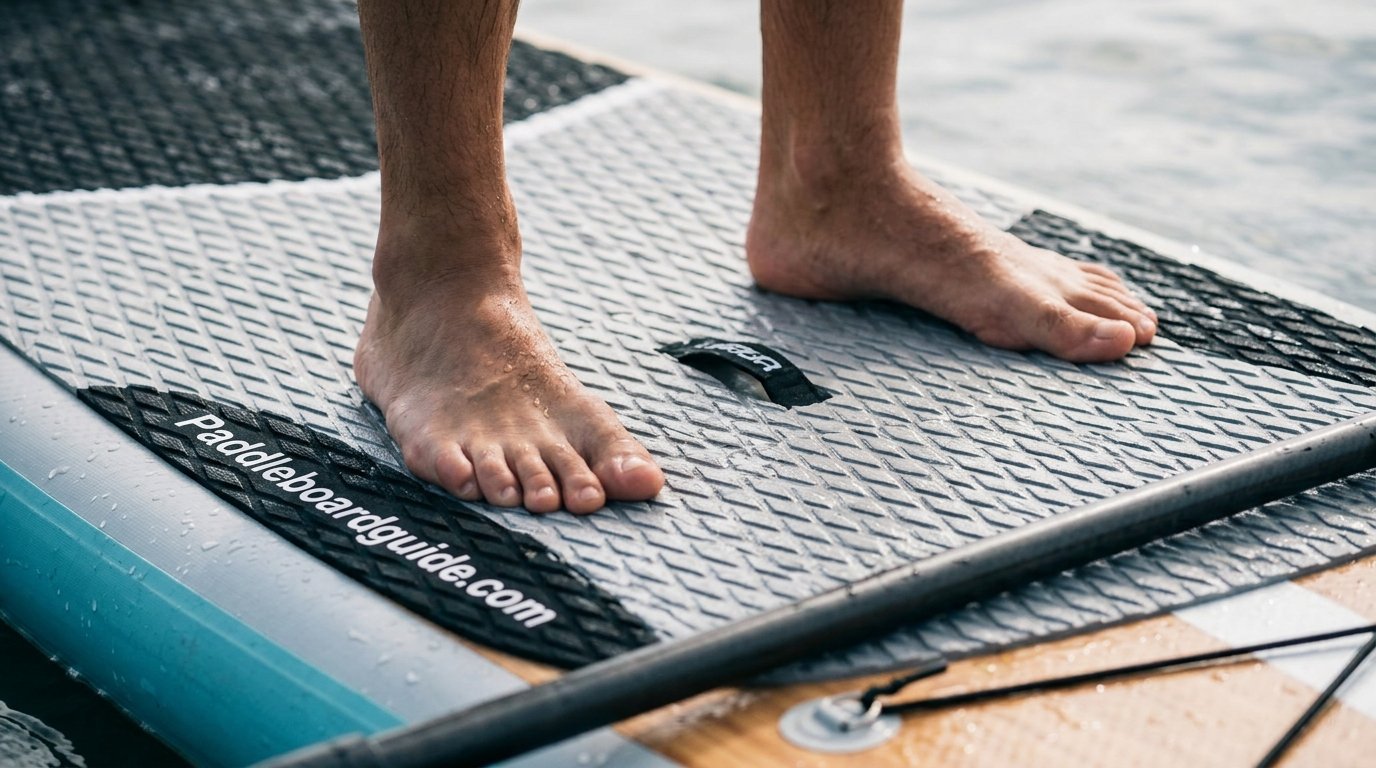
Stand-up paddle boarding (SUP) is exactly what it sounds like: you stand on a wide, buoyant board and propel yourself across the water using a long single-bladed paddle. It traces its roots to Hawaiian surf instructors who stood on their boards to get a better view of incoming swells, and it has since grown into one of the fastest-growing water sports in the world, partly because the learning curve is so forgiving.
Unlike surfing, you don’t need waves. Unlike kayaking, you don’t need a seat. A calm lake, a slow river, or a protected bay is all you need to get started. The sport rewards balance and core engagement more than raw strength, which is why people of nearly any age and fitness level pick it up within a single session. If you’re still deciding whether SUP is worth the investment, our full paddle board overview breaks down the different disciplines — touring, yoga, fishing, and whitewater SUP — so you can see where your interests fit.

Check Price on Amazon
2. Choosing Your First Paddle Board
Board selection matters more than almost any other decision you’ll make before your first outing. A board that’s too narrow or too short will feel twitchy and undermine your confidence before you’ve even learned the basics. A board that’s too long or heavy will be a hassle to transport and store.
Volume and Stability
Volume, measured in liters, tells you how much weight a board can support while staying stable. As a rough rule, beginners should look for boards rated to hold at least 30–40 lbs more than their body weight to leave a comfortable margin. Our guide on how much weight a paddle board can hold walks through the exact math if you want to get precise.
| Board Type | Best For | Typical Length | Stability |
|---|---|---|---|
| All-Around Touring | First-time buyers, flat water | 10’6″ – 11’6″ | High |
| Yoga / Fitness | Studio-style workouts on water | 10′ – 11′ | Very High |
| Touring / Displacement Hull | Long-distance paddling, speed | 12’6″ – 14′ | Moderate |
| Fishing SUP | Anglers needing deck space | 10’6″ – 11’6″ | Very High |
| Whitewater / River SUP | Moving water, rapids | 8′ – 9’6″ | Moderate |
Inflatable boards have become the default recommendation for beginners because they pack down into a backpack-sized bag, resist dings, and are noticeably cheaper to ship. If you want brand-specific detail, our reviews of the iRocker all-around board, the iRocker Nautical, the BOTE inflatable lineup, and the budget-friendly Retrospec Weekender compare real-world stability, materials, and price.
Inflatable Boards — Pros
- Compact, easy to store in an apartment or car trunk
- Forgiving if you drop it or bump a dock
- Usually cheaper for comparable size
Inflatable Boards — Cons
- Slightly less rigid at speed than a hard board
- Requires 8–12 minutes of pumping before each session

View on Amazon
3. Essential Gear You’ll Need
Beyond the board itself, a short list of accessories separates a smooth first session from a frustrating one.
- Paddle — sized to your height, ideally adjustable. See our breakdown of the best paddle board paddles for material and length guidance, and check whether paddle board paddles float before you head out, since not all of them do.
- Personal Flotation Device (PFD) — required by law in most regions once you’re beyond a swimming area.
- Leash — keeps the board tethered to your ankle so it doesn’t drift away after a fall.
- Whistle — a legally required signaling device in many jurisdictions.
- Dry bag — for your phone, keys, and snacks.

Shop Paddles
4. Safety Requirements & Rules
The U.S. Coast Guard classifies paddle boards as vessels once you leave a designated swimming zone, which means the same basic safety requirements that apply to kayaks and canoes apply to you. Our detailed paddle board safety requirements guide covers regional differences, but the core checklist looks like this:
| Requirement | Why It Matters |
|---|---|
| USCG-approved PFD | Legally required outside swim zones in most U.S. waters |
| Whistle or sound signal | Alerts nearby boats in fog or low visibility |
| Leash | Prevents separation from your board after a fall |
| Light (night paddling) | Required after sunset in navigable waterways |
Always check wind and weather before launching — onshore wind can make paddling back to shore exhausting, while offshore wind can carry an unprepared paddler dangerously far out. Tell someone your planned route and expected return time, especially if you’re paddling solo.
5. Prepping the Board: Inflating & Carrying
If you’re using an inflatable board, plan on 8–12 minutes of pumping with a standard dual-action hand pump, or 3–5 minutes with an electric pump. Most boards recommend 12–15 PSI; check the valve cap for the exact number. Under-inflating is the single biggest cause of a “mushy,” unstable feeling on the water.
To carry the board to the water, use the built-in center handle and let the board rest against your hip, deck facing out, so wind can’t catch it like a sail. For longer carries, a shoulder strap or two-person carry (one at the nose, one at the tail) is far less tiring.
6. Step-by-Step: Getting On and Standing Up
This is the part everyone worries about — and the part that clicks fastest once you actually try it. Follow these steps in order. Each one includes a labeled diagram, a real photo, and where useful, a short video.
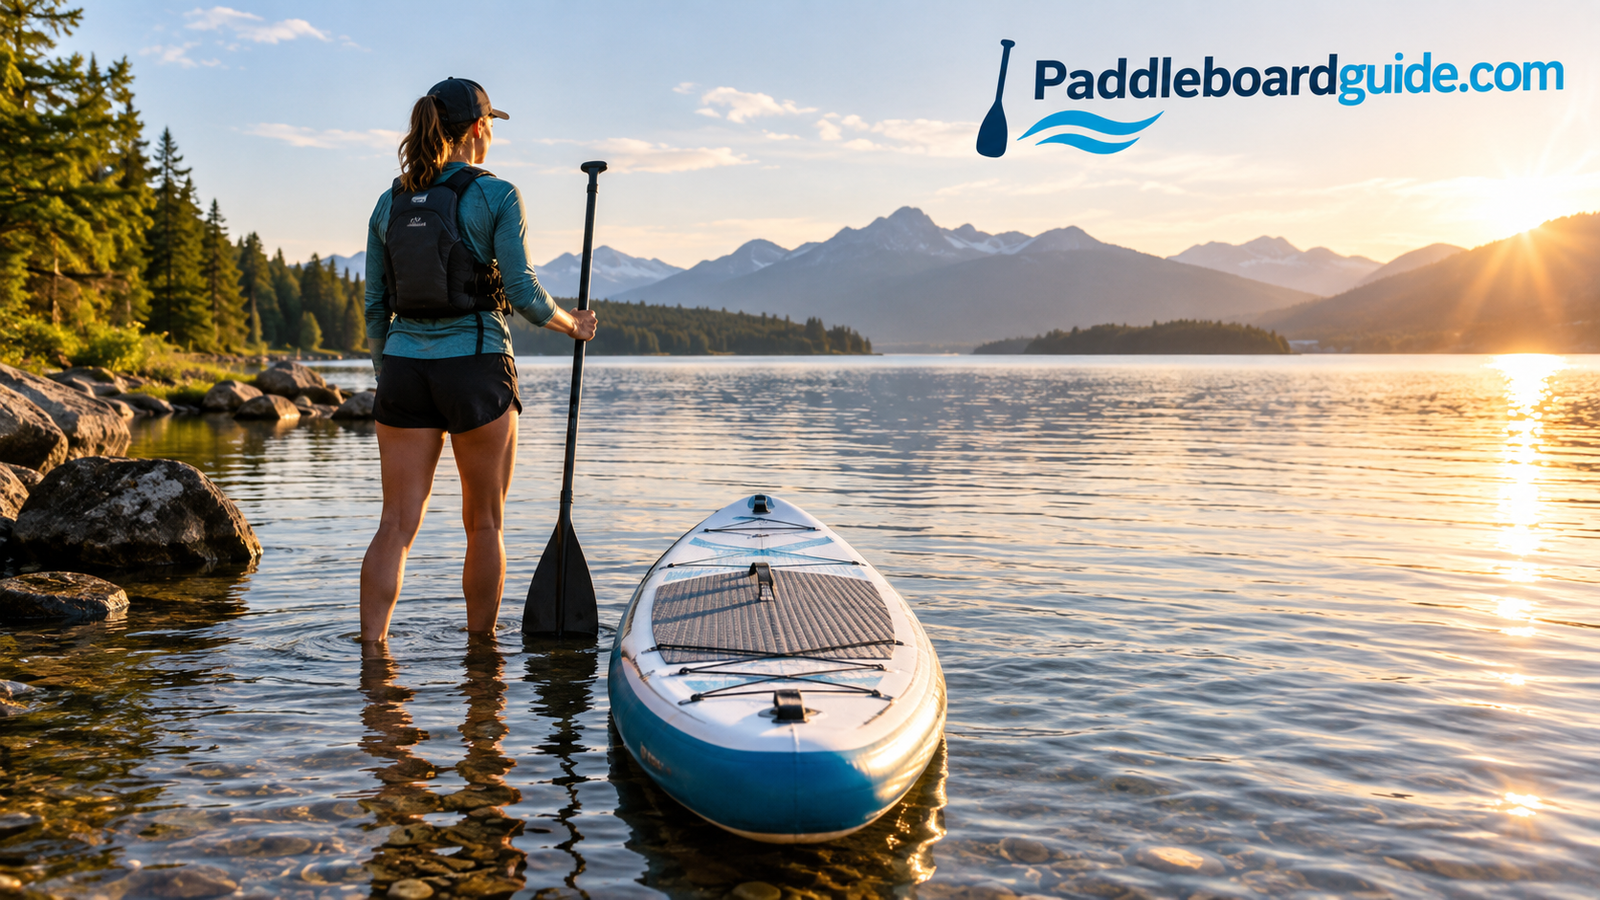
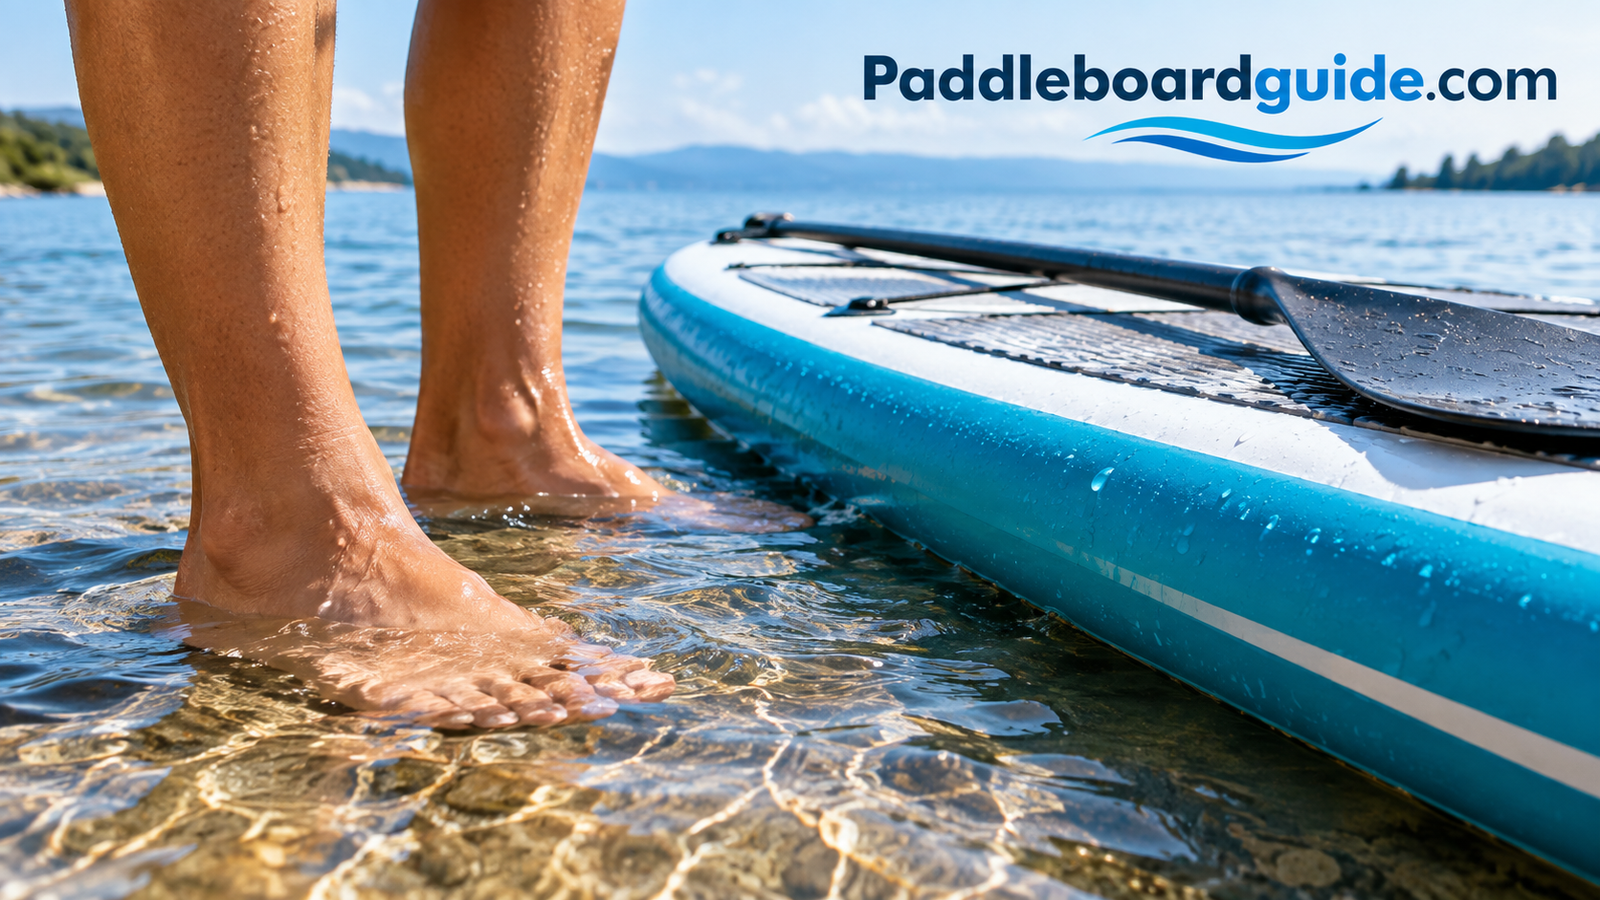
1Launch in Water You Can Stand In
Wade out until the water is knee-to-waist deep — deep enough that your fin won’t hit the bottom, shallow enough that you can stand up if you fall. Point the nose of the board directly into any wind or current so it doesn’t get pushed sideways into you.
2Climb On at the Center Point
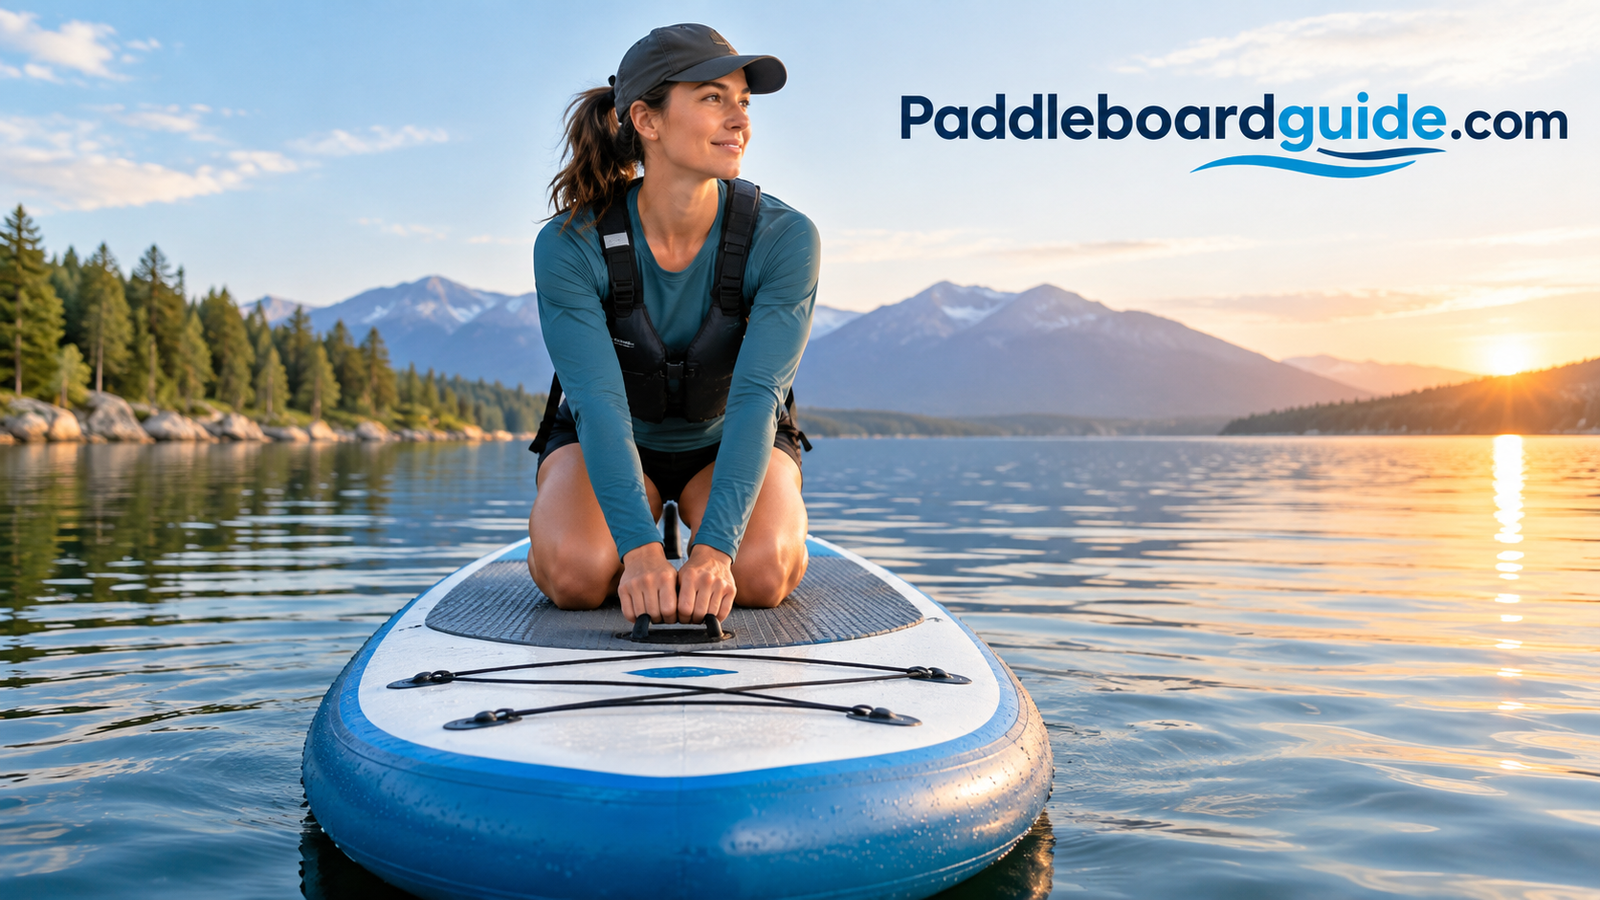
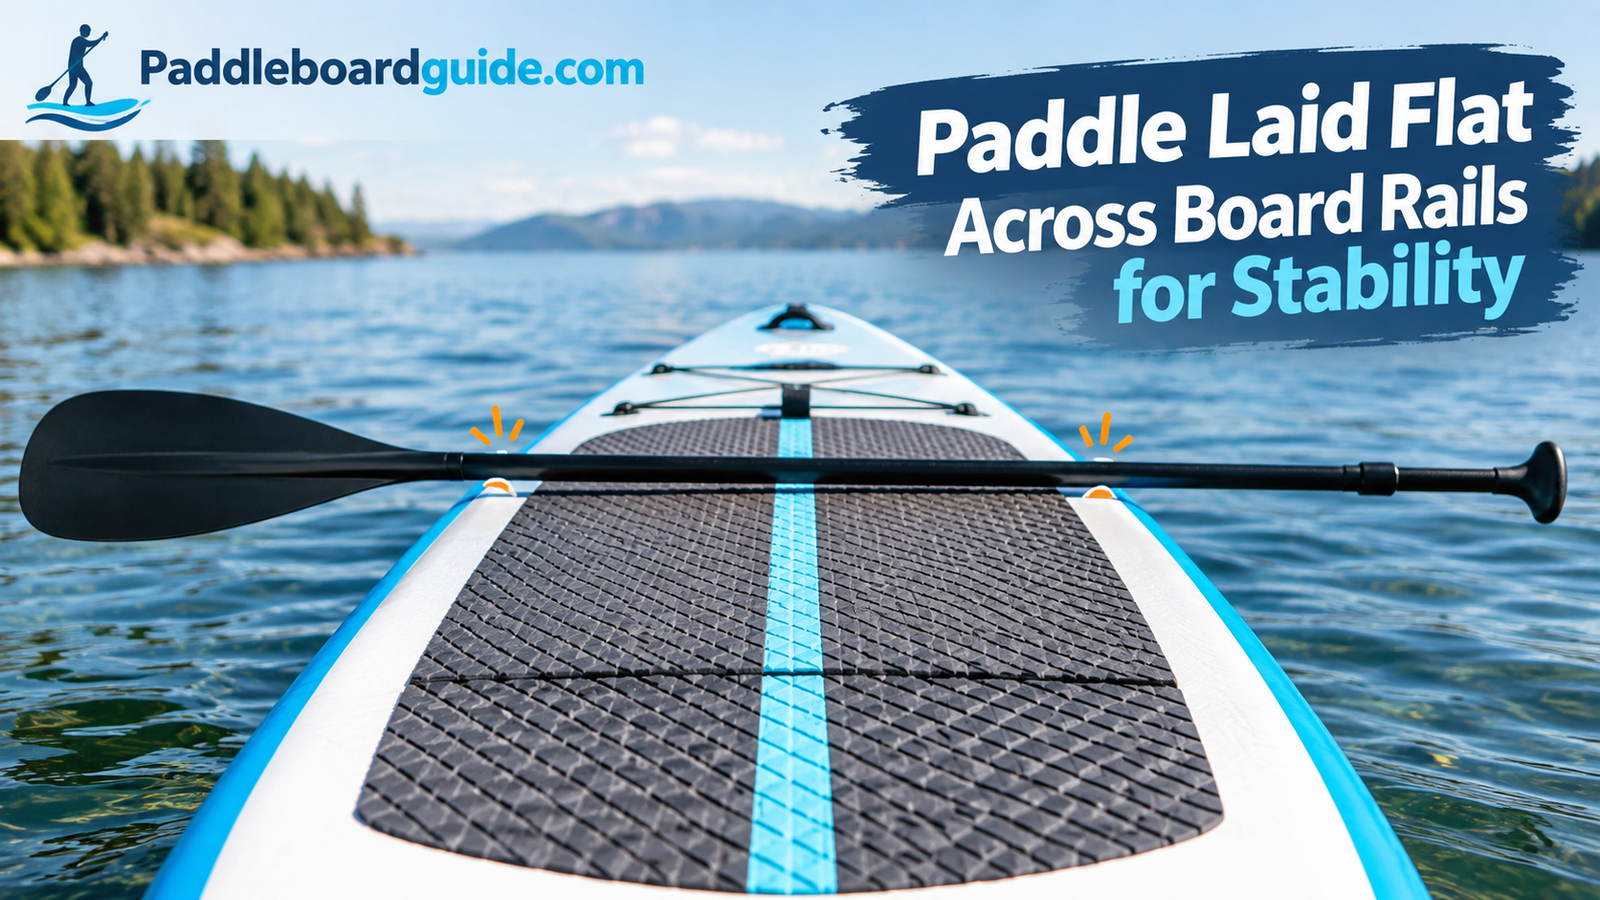
Place your paddle across the board, blade forward, so it acts as a stabilizing outrigger. Grip both rails (edges) of the board and climb on with one knee, then the other, landing directly on the carry handle — this is the board’s balance point.
3Find Your Kneeling Balance
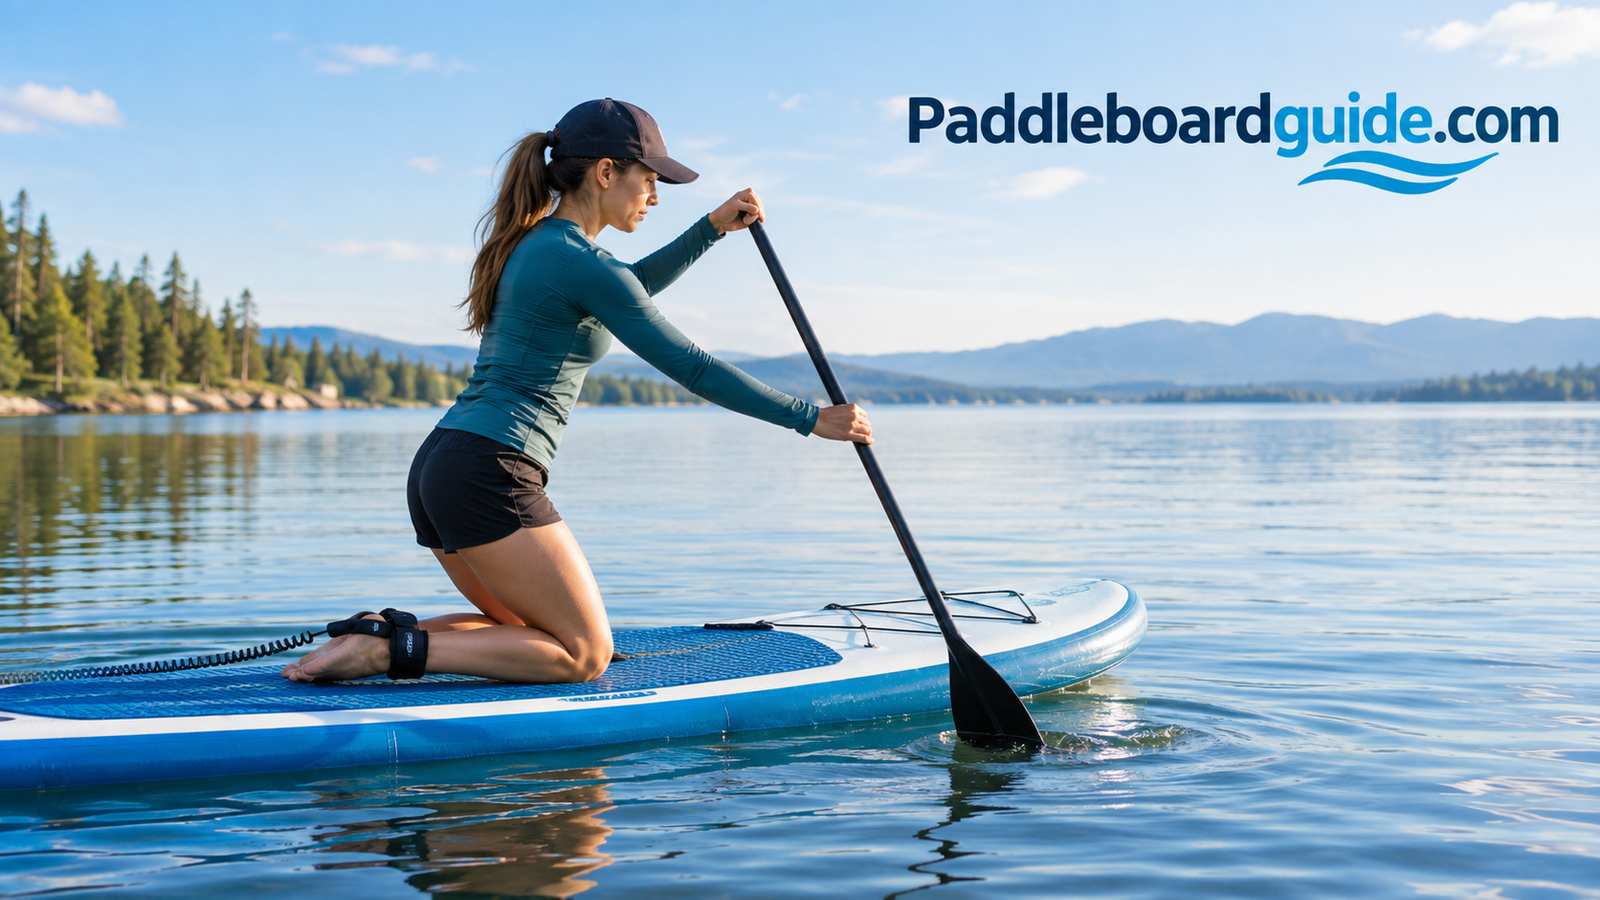
Before standing, spend 15–30 seconds kneeling and paddling gently. This confirms the board is stable, lets you feel how it responds to small shifts in weight, and settles any nerves.
4Stand Up One Foot at a Time
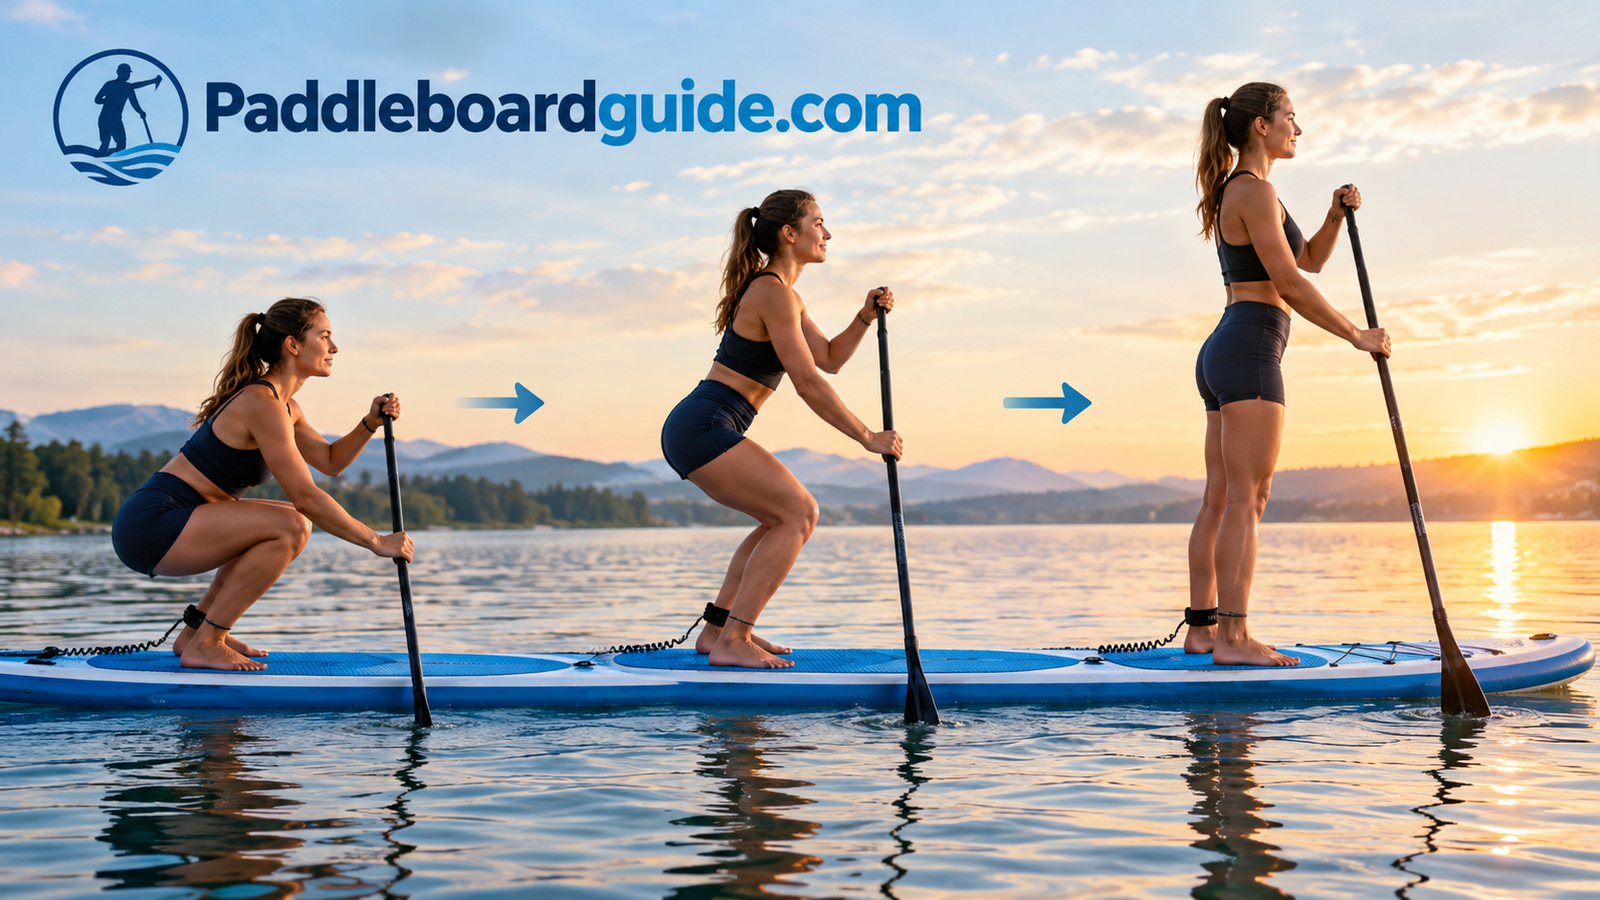
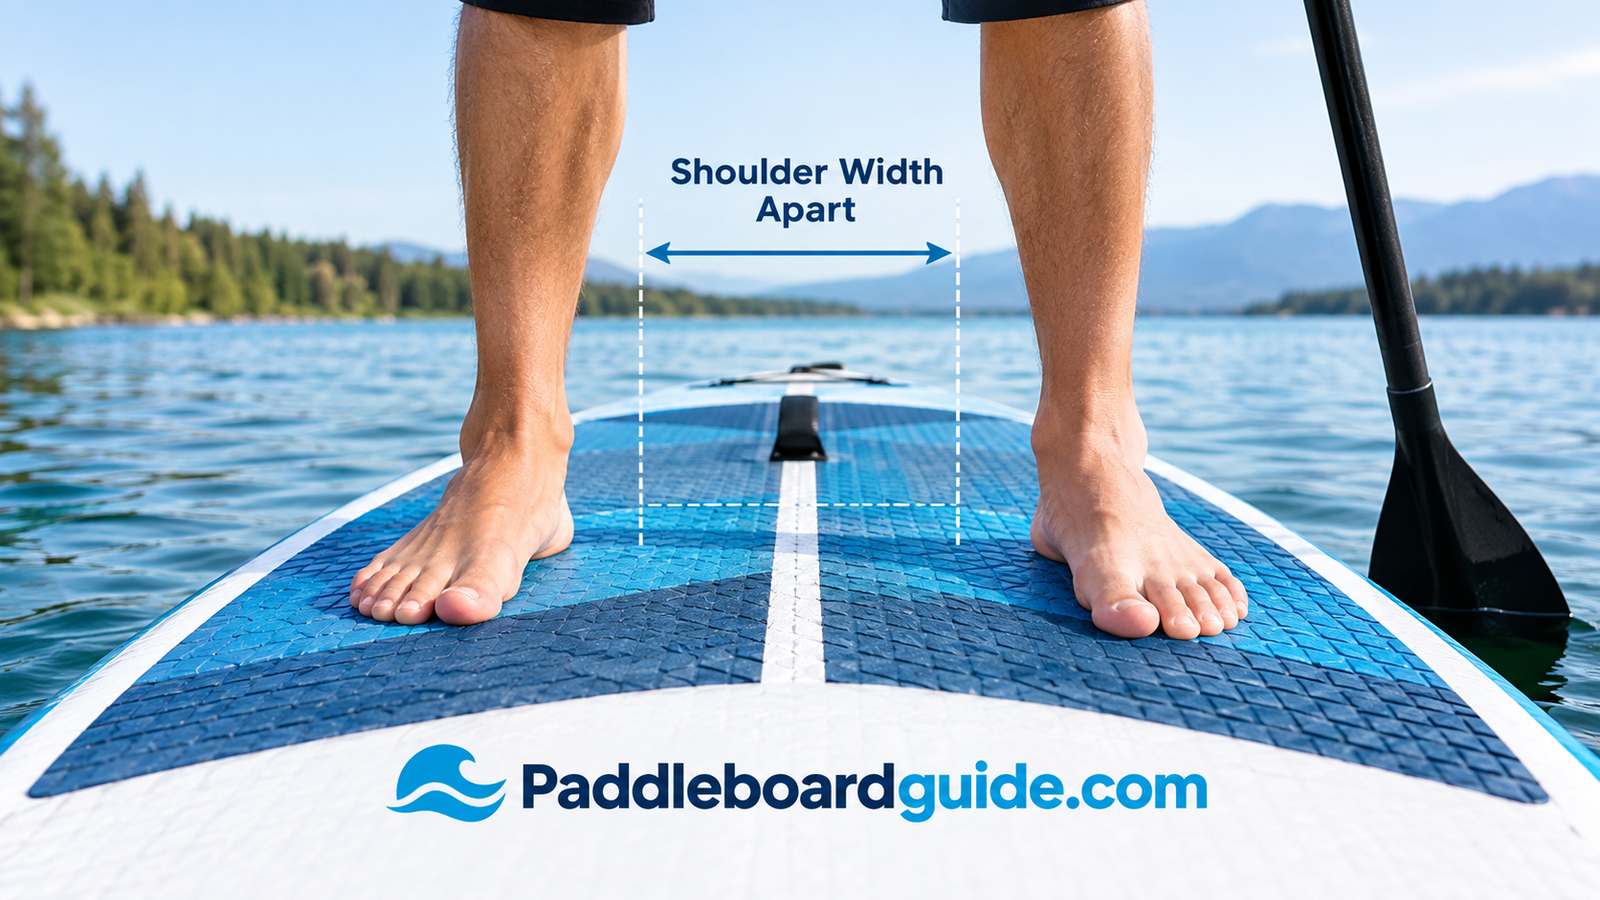
Place both hands flat on the deck beside your knees. Bring one foot up into a low squat, then the other, so your feet land where your knees were — roughly shoulder-width apart, straddling the center line. Keep your eyes on the horizon, not your feet; looking down is the number-one cause of an early fall.
5Stack Your Joints and Soften Your Knees
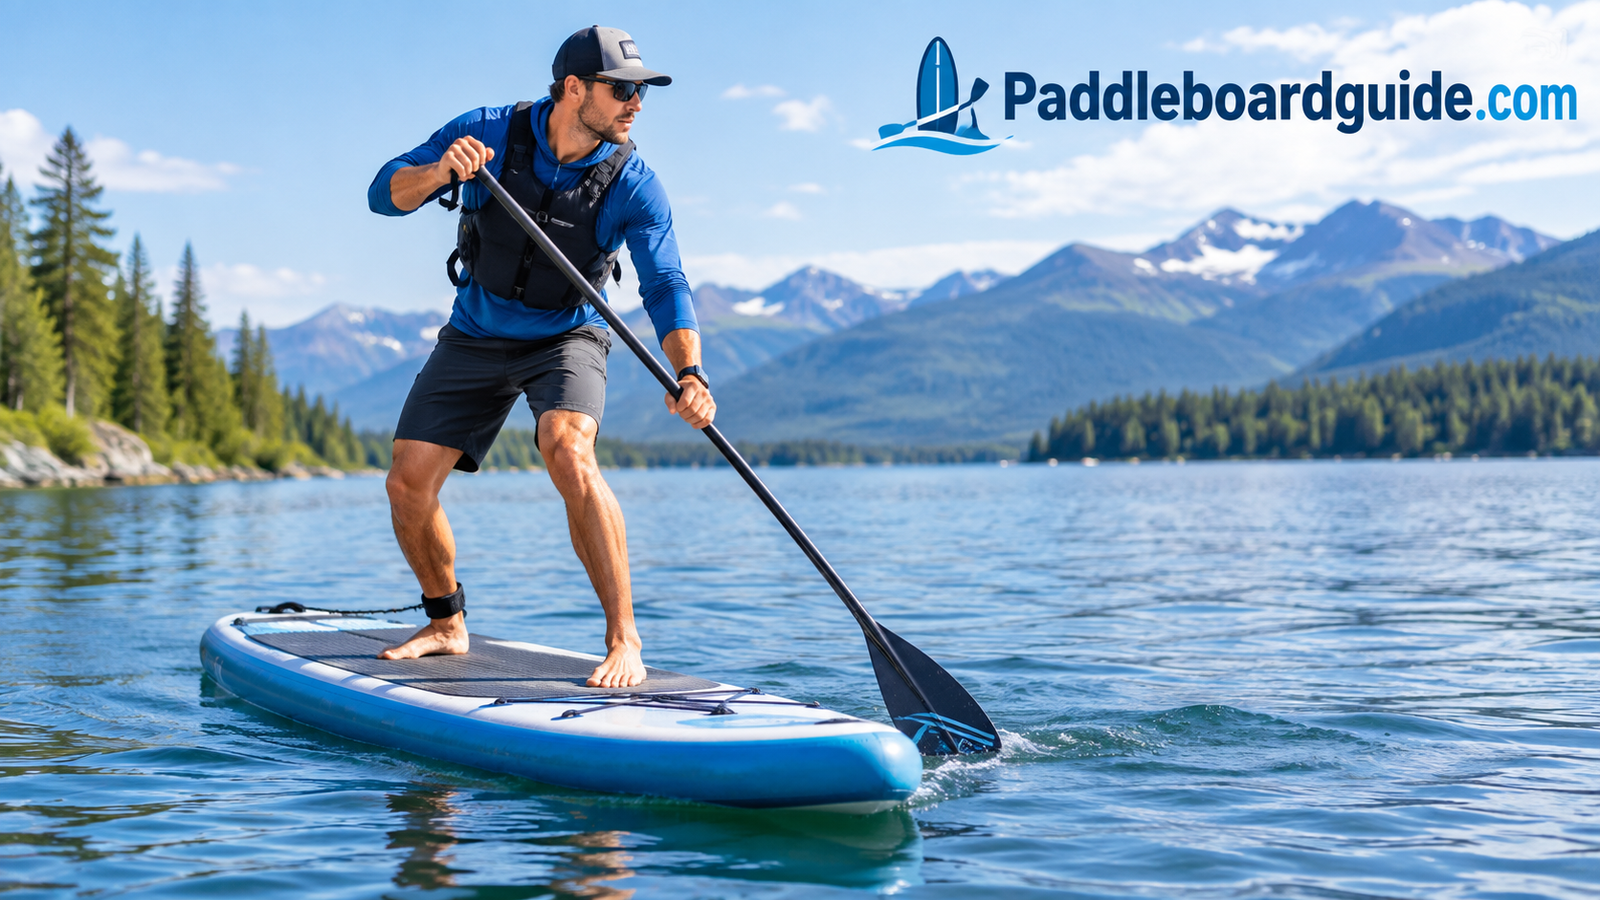
Once standing, keep a slight bend in your knees and hips — think “athletic stance,” like you’re about to catch a ball. Stiff, locked legs turn every small wave or wobble into a fall; soft knees absorb it instead.
6Take Your First Standing Strokes
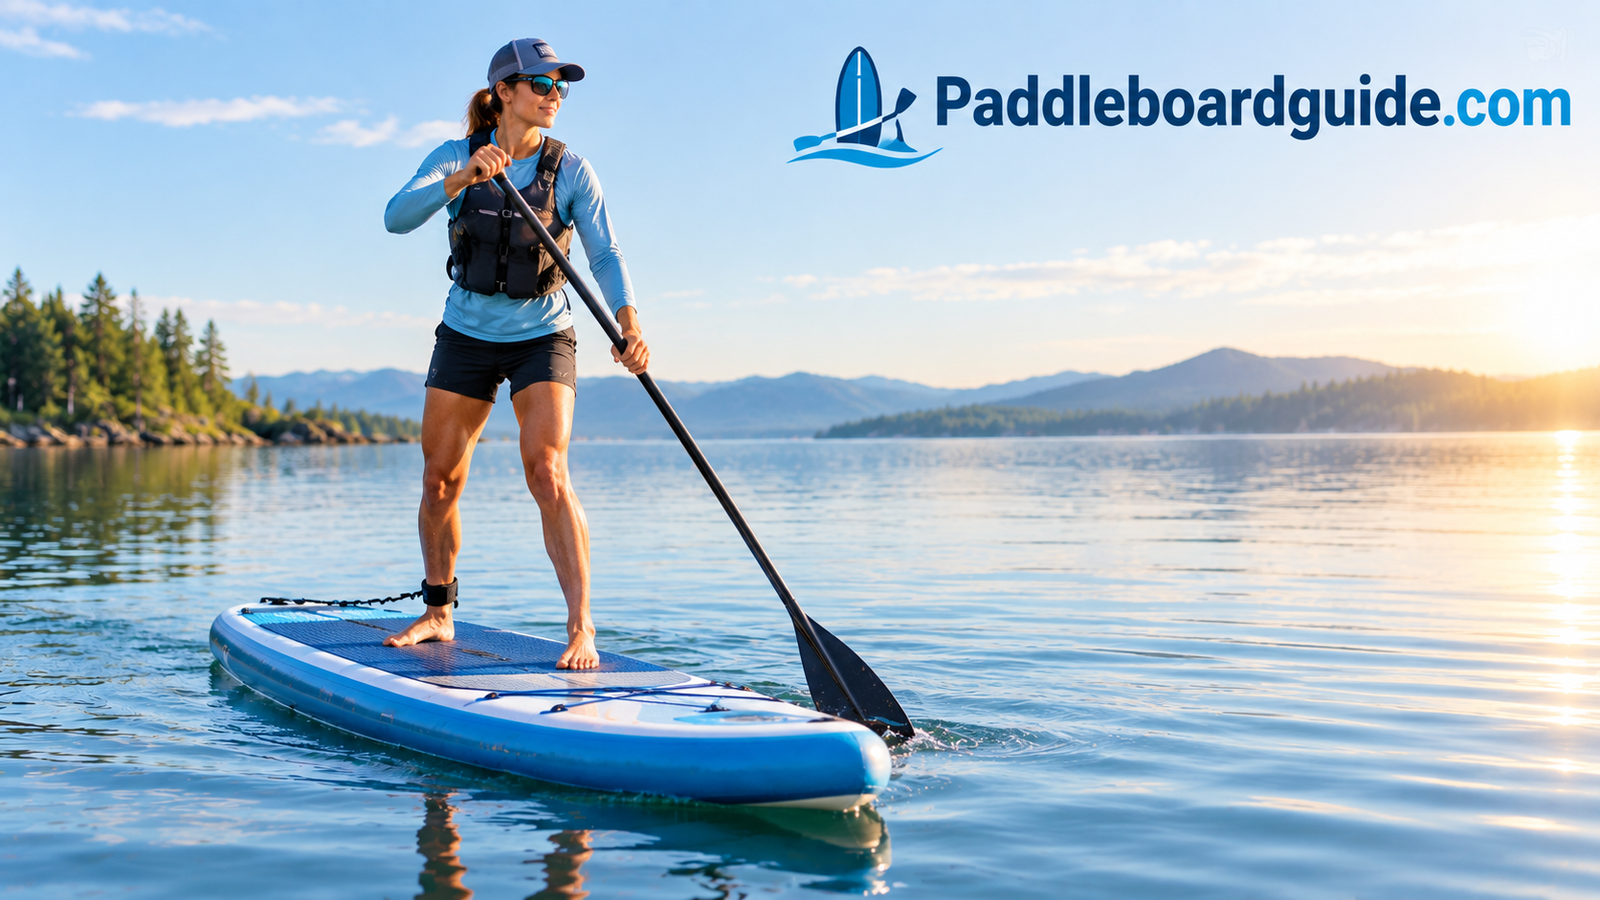
Reach forward with the paddle, blade fully submerged, and pull back alongside the board to about your ankle. Rotate from your torso rather than just your arms — this single adjustment is responsible for most of the speed and efficiency gains beginners see in their first week.

Shop Leashes
7. Paddling Stance & Grip
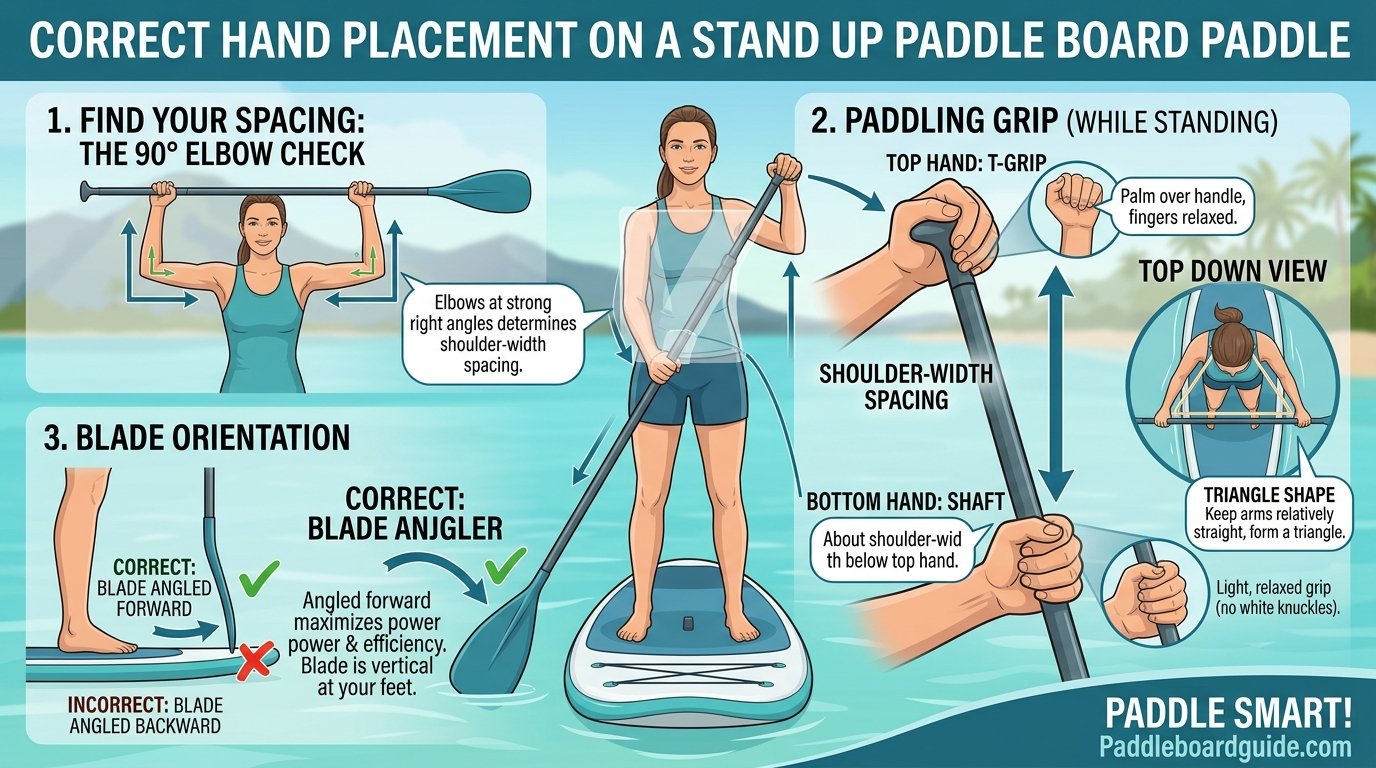
Grip the paddle with one hand on the T-shaped top handle and the other roughly shoulder-width down the shaft. The blade’s angle should tilt slightly forward (away from you) at the top of the stroke — a surprising number of beginners hold it backward, which cuts efficiency in half.
8. Core Paddling Strokes
Three strokes cover almost everything you’ll need in your first season:
- Forward stroke — your cruising stroke, alternating sides every 3–4 strokes to stay on course.
- Sweep stroke — a wide arc away from the board, used for turning.
- Reverse stroke — paddling backward to slow down or back away from a dock.
9. Turning Techniques
For a wide, gentle turn, alternate sweep strokes on the same side. For a fast pivot, step back toward the tail to lift the nose out of the water, then sweep — this is the same technique surfers use to spin around and catch a wave.
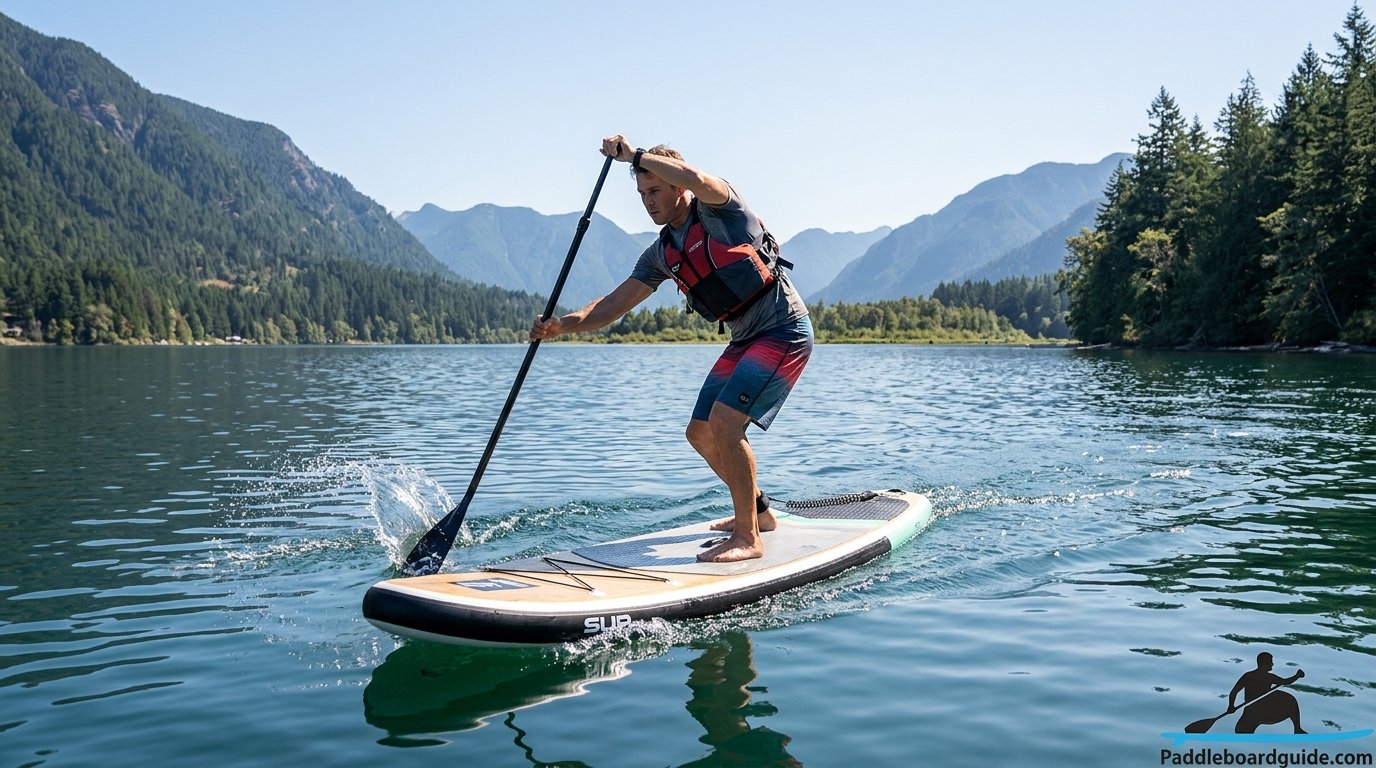
10. Balance, Falling, and Getting Back On
Everyone falls — usually sideways, off the rail. The safest way to fall is away from the board, flat into the water, rather than trying to catch yourself and risk a wrist or ankle injury. Once in the water, swim to the center handle, and repeat the same climb-on process from Step 2.
What Helps Balance
- Bent knees, relaxed shoulders
- Eyes on the horizon, not your feet
- Small, quick corrective steps rather than big lunges
What Hurts Balance
- Locked knees
- Staring down at your feet
- Overcorrecting with a big weight shift
11. Types of Paddle Boards Compared
Once the basics click, most paddlers start noticing which board style fits their goals. For a deeper dive, see our full breakdown of paddle board types, how paddle boards are actually made, and the ongoing SUP board vs. paddle board terminology debate.
| Type | Learning Curve | Longevity |
|---|---|---|
| All-Around Inflatable | Easy | 5–10 years with care |
| Hard Epoxy Touring | Moderate | 10+ years |
| Yoga / Fitness | Easy | 5–10 years |
| Whitewater | Hard | 5–8 years |

Browse Boards
12. Common Beginner Mistakes
- Standing up too fast — skipping the kneeling balance check almost always ends in an early swim.
- Holding the paddle backward — the blade angle should point away from you at the catch.
- Paddling only with arms — torso rotation is where the real power comes from.
- Ignoring wind direction — always plan your return leg into the wind while you’re still fresh.
- Skipping the leash — a board blown 50 yards away in seconds is a common, avoidable problem.
13. Paddling in Wind, Chop, and Waves
Flat, glassy water is where you should learn — but sooner or later you’ll get caught out by a breeze picking up or a powerboat’s wake rolling through. Knowing how to handle wind and chop is what separates a paddler who turns back at the first ripple from one who can actually go anywhere.
Reading the Wind Before You Launch
Wind affects a stand-up paddle board more than almost any other small craft, because your body acts like a sail. Check a wind forecast before every session, not just a weather app’s general “sunny” icon — apps built for sailing or kiteboarding (Windy, Windfinder) show speed and direction far more precisely than a standard weather app. As a rule of thumb, winds under 10 mph are comfortable for most beginners, 10–15 mph starts to feel like real work, and anything above 15 mph is a good day to paddle a sheltered cove instead of open water.
The golden rule for windy days: paddle out into the wind first, while you’re fresh, and let the wind carry you home when you’re tired. Beginners who do the opposite — paddling downwind first because it feels easy — often find themselves exhausted and fighting a headwind on the return leg, which is how minor outings turn into search-and-rescue calls.
Adjusting Your Stance for Chop
In choppy water, widen your stance slightly beyond shoulder-width and drop your center of gravity a bit lower than you would on flat water. Bend your knees more than feels natural at first. Instead of trying to stay perfectly still, let your knees and hips absorb the board’s movement — think of your legs as suspension, not a rigid pillar. Look toward the horizon or your destination, not down at the waves passing under the nose.
Paddling Through Boat Wakes
When a wake approaches, angle the nose of the board directly into it rather than taking it broadside. Taking a wake sideways is one of the fastest ways to get knocked off balance, since the wave lifts one rail while the other stays low. If multiple wakes are coming in a series, keep paddling gently through each one to maintain momentum — a moving board is more stable than a stationary one.
Good Habits in Rough Conditions
- Wider stance, lower center of gravity
- Nose pointed into waves and wakes
- Shorter, quicker strokes to maintain control
- Kneeling down if conditions worsen suddenly
What Gets Beginners in Trouble
- Paddling downwind first, then fighting a headwind home
- Taking a boat wake broadside
- Staying standing when kneeling would be safer
- Underestimating how fast conditions change on open water
If conditions deteriorate faster than expected, drop to your knees immediately. A kneeling paddler is dramatically more stable than a standing one, and covering distance on your knees beats falling in repeatedly. There’s no shame in finishing a windy session on your knees — plenty of experienced paddlers do exactly that.
Reading Whitecaps and Building Swell
Small ripples with no foam are usually still comfortable for a beginner. Once you start seeing consistent whitecaps — waves breaking with visible white foam at the crest — wind speed has typically crossed into the 15–20 mph range, and it’s a reasonable signal to head for sheltered water rather than push forward. On open coastline or large lakes, swell can build steadily over an afternoon even if it looked calm at launch, which is another reason to check conditions before you go rather than relying on how the water looks from shore.
An Introduction to Downwind Paddling
Once you’re comfortable handling chop, downwind paddling — riding wind-driven swell in the direction the wind is already pushing you — becomes an option many intermediate paddlers actively seek out rather than avoid. The technique involves reading the bumps ahead, timing your strokes to catch a small push from each one, and using your legs to absorb the drop as the board accelerates down the face of a swell. This is a genuinely different skill from flat-water paddling and is best learned with an experienced paddler or instructor the first few times, ideally with a support boat nearby, since currents and wind can carry you well past your intended landing spot if you misjudge conditions.
14. Muscles Worked & Calories Burned: SUP as a Workout
Paddle boarding is deceptively good exercise. Because you’re constantly making tiny stabilizing adjustments just to stay upright, muscles that a treadmill or stationary bike barely touch get a steady workout for the entire session.
Which Muscles Actually Do the Work
| Muscle Group | Role While Paddling |
|---|---|
| Core (abs & obliques) | Stabilizes your torso with every micro-adjustment and stroke rotation |
| Shoulders & back | Drive the reach and pull phase of every stroke |
| Legs & glutes | Absorb chop and wake, hold your athletic stance |
| Forearms & grip | Control the paddle angle and blade entry |
| Stabilizer muscles (ankles, feet) | Constant small corrections to stay balanced |
Calories Burned Paddle Boarding
A relaxed, flat-water cruise burns roughly as many calories per hour as a brisk walk. Push the pace, add some chop, or paddle against a headwind, and the effort climbs toward what you’d expect from a moderate cycling or hiking session. SUP yoga and fitness-focused sessions that add squats, lunges, and planks on the board push the calorie burn higher still, since your stabilizer muscles are firing the entire time just to keep the board under you.
Building a Weekly SUP Fitness Routine
If you’re using paddle boarding as a fitness habit rather than just a weekend activity, structure sessions the way you would any other cardio:
- Steady-state days — 30–45 minutes of continuous forward paddling at a conversational pace to build endurance.
- Interval days — alternate 1–2 minutes of hard paddling with 1–2 minutes of easy recovery paddling.
- Core days — combine on-board planks, squats, and balance holds (see the SUP yoga section below) with light paddling between sets.
- Technique days — slow, deliberate strokes focused purely on torso rotation and blade angle rather than speed.
Because SUP is low-impact, it’s also a popular option for people returning from a joint injury or looking for cross-training that doesn’t pound their knees the way running does. As with any new fitness routine, build up gradually and let soreness — especially in the core and forearms — guide how quickly you add volume.
How SUP Compares to Other Cardio
Compared to running or cycling, paddle boarding places far less repetitive stress on the knees and hips, since the water supports your body weight and the movement pattern is a rotational pull rather than an impact stride. Compared to swimming, it adds a significant balance and stabilizer-muscle component that swimming, done in a controlled pool environment, doesn’t require. Many paddlers use SUP as an active recovery day between harder running or lifting sessions specifically because it stays aerobic without adding joint load.
A Sample First Month
| Week | Focus | Session Length |
|---|---|---|
| Week 1 | Balance and basic standing strokes, flat water only | 20–30 min |
| Week 2 | Continuous forward paddling, introduce turning strokes | 30–40 min |
| Week 3 | Add one interval session; try light chop if conditions allow | 40 min |
| Week 4 | Combine steady-state and interval sessions; try SUP yoga or a longer tour | 45–60 min |
Progress at whatever pace your balance and comfort allow — some paddlers are ready for longer sessions by week two, while others benefit from staying on flat, sheltered water for a full month before adding any wind or chop.
15. Paddle Board Yoga for Beginners
SUP yoga takes a familiar practice and adds an unstable surface, which forces even simple poses to recruit far more stabilizing muscle than they would on a mat. It’s also, for many people, simply more fun — there’s something about balancing over open water that focuses the mind in a way a studio floor doesn’t.
Setting Up for SUP Yoga
Use a dedicated yoga or fitness board if you can — they’re wider, flatter, and often have a full-length deck pad for grip and comfort during floor poses. Practice in calm, flat, warm water with no current, and anchor the board loosely or have a paddling partner nearby if you drift toward a channel or dock.
Beginner-Friendly Poses to Start With
- Seated or kneeling pose — the easiest starting point; get comfortable simply sitting still and feeling the board’s natural movement before attempting anything standing.
- Tabletop / cat-cow — builds confidence on all fours, where your base of support is widest.
- Downward dog — a good bridge between kneeling and standing poses, since your hands and feet both stay in contact with the deck.
- Standing mountain pose — simply standing tall with feet together is genuinely challenging on water and a great milestone pose.
- Warrior II — attempt only once mountain pose feels stable; the wider stance actually helps balance more than a narrow one.
Expect to fall in — often. That’s part of the practice, not a failure of it. Most SUP yoga instructors treat an unplanned swim as a natural part of the session rather than something to avoid at all costs.
Breathing, Pacing, and Safety on the Water
Because balance takes more conscious effort on a board than on a mat, it’s easy to unconsciously hold your breath through a difficult pose — try to keep your breathing slow and steady even when you’re wobbling, since tension in the breath tends to translate directly into tension in the hips and shoulders, which makes balance worse rather than better. Move between poses more slowly than you would in a studio class, and hold each transition briefly in a stable, neutral position (seated or tabletop) before advancing to the next pose. Sunscreen, a hat, and water are easy to forget once you’re focused on balance, but a SUP yoga session often runs longer than expected once you’re absorbed in it.
Useful Props and Modifications
A few small adjustments make early sessions considerably easier. Deflating your board slightly below its normal PSI adds a touch of deck give that some beginners find easier on the knees during floor poses. A wider stance than you’d use on land is almost always more stable for standing poses on water. If a full pose feels unreachable, holding the modified or “half” version of it — a bent-knee forward fold instead of a straight-leg one, for instance — is a completely reasonable substitute rather than a failure to complete the pose correctly.
Shop Yoga SUP Boards
16. Paddle Boarding with Kids & Family
SUP is one of the easier water sports to introduce to children, since the low, wide platform feels less intimidating than a kayak’s cockpit and doesn’t require the coordination that surfing does.
Age and Readiness
There’s no single official minimum age, but most instructors look for comfort in the water and basic swimming ability before putting a child on a board of their own — often somewhere in the 6–8 year range for solo paddling on a small, stable board, with tandem paddling (child riding with an adult) possible much younger under close supervision.
Choosing a Board for Kids
A wider, shorter, high-volume board is more forgiving for a lighter, less experienced paddler than the same board a full-grown adult would choose. Some brands make dedicated youth-sized boards; alternatively, a family all-around board wide enough for a parent doubles as a stable platform for a child paddling solo in calm, shallow water.
Making It Fun for Kids
- Start tandem, with the child sitting or kneeling in front
- Practice in a swim area with lifeguards nearby
- Let them play — kneeling games, “who can sit up straight the longest”
- Keep sessions short; 20–30 minutes is plenty for a first outing
Non-Negotiables for Kids on a Board
- A properly fitted, child-sized PFD — always, no exceptions
- Close adult supervision within arm’s reach in open water
- Calm, shallow, swim-zone water only for first sessions
- A leash sized appropriately for their board
Families planning a full outing together may also want to compare board capacity against combined body weight if more than one person will ride the same board — our weight capacity guide covers tandem loads specifically.
A Simple Teaching Progression for Kids
Children generally build confidence fastest with a clear, low-pressure sequence rather than being asked to stand up right away. A workable progression looks like: first, sitting still on a beached or held-steady board to get used to the feel of it moving underfoot; second, kneeling and paddling short distances in ankle-deep water while an adult walks alongside; third, standing with an adult’s hand available for balance; and only then, standing and paddling independently in a supervised swim area. Rushing this sequence is the most common reason kids lose interest after one bad fall — a slower start almost always produces a more confident, more willing paddler by the end of the day.
Keep praise focused on effort and small wins (staying on for ten seconds, taking one full stroke) rather than only celebrating a fully standing paddle, since that keeps kids engaged through the wobbly middle stage that every beginner, adult or child, has to get through.
17. Paddle Boarding with Your Dog
Dogs take to paddle boarding surprisingly well once they get past the initial wobble — the wide, stable deck of most all-around boards gives them plenty of room to lie down, sit, or stand once they’re confident.
Introducing Your Dog to the Board
Start on dry land: let your dog walk across the board in your yard or on a dock so the surface and slight give underfoot aren’t a surprise on the water. Then try the board floating in shallow water while it’s still tethered or held steady, rewarding calm behavior with treats. Only add motion — actual paddling — once your dog is comfortable simply standing still on a stationary board.
Gear for Paddling with a Dog
- Dog-specific PFD — with a sturdy top handle so you can lift your dog back onto the board if it falls in.
- Traction pad or towel — extra grip in the mid-board area where your dog will likely settle.
- Fresh water — for your dog to drink, especially on saltwater or hot-weather outings.
Position your dog centered and slightly forward of your own stance, low to the deck, which keeps the board’s balance point stable and gives your dog the most secure footing. Keep first outings short, calm, and close to shore, and always assume your dog may jump or fall in — a leashed, PFD-equipped dog is far easier to recover than one that’s neither.
Reading Your Dog’s Comfort Level
Watch for signs of stress rather than assuming a quiet dog is automatically a relaxed one — panting heavily, pinned-back ears, a tucked tail, or repeatedly trying to move to the very edge of the board are all signs your dog isn’t comfortable, and it’s worth paddling back to shore rather than pushing through a session your dog is actively unhappy about. Confident, food-motivated dogs and breeds bred for water work (retrievers, spaniels, and similar) often adapt fastest, but plenty of dogs of any breed do well with a patient, gradual introduction — temperament and prior water exposure matter more than breed alone.
What to Do If Your Dog Jumps or Falls In
Stay calm and keep paddling toward your dog rather than trying to lunge for them, which risks putting you both in the water. Most dogs will swim confidently once they realize they’re in the water, and a PFD with a top handle lets you lift them back onto the board by the handle rather than trying to grab fur or a collar. Praise your dog once they’re back aboard so a fall doesn’t become a negative association that makes future sessions harder.
18. Renting vs. Buying Your First Board
Almost every popular paddling destination has rental shops, and renting a few times before buying is one of the smartest moves a true beginner can make.
| Renting | Buying | |
|---|---|---|
| Upfront cost | Low, pay-per-session | Higher, one-time |
| Try different board types | Easy — swap styles each visit | Committed to what you own |
| Convenience | No storage, transport, or maintenance | Board is ready whenever you are |
| Cost over a full season | Adds up quickly with regular use | Cheaper per session long-term |
A reasonable approach: rent for your first 3–5 outings, trying a couple of different board widths and lengths if the rental shop offers them. This tells you far more about what actually feels stable and comfortable for your body than any spec sheet can. Once you know you’ll paddle regularly — and roughly which board category suits you — buying starts paying for itself within a single season for most people who paddle more than a handful of times a year.
Questions Worth Asking a Rental Shop
- What board widths and lengths do you carry, and which do you recommend for a beginner my size?
- Is the PFD, paddle, and leash included, or rented separately?
- Do you offer a short orientation or lesson with the rental?
- Are there calm, sheltered launch points nearby that you’d recommend for a first-timer?
Many shops near lakes and calm bays also offer guided beginner tours, which combine a rental with basic instruction — often the single most efficient way to go from complete novice to comfortable, independent paddler in one outing.
Compare Beginner Packages
19. Transporting Your Paddle Board
How you get your board to the water is a bigger practical question than most beginners expect — and it’s often the deciding factor between an inflatable and a hard board.
By Car
An inflatable board deflates into a duffel bag that fits in a trunk or back seat, which is why it’s the default recommendation for anyone without roof racks. Hard boards require soft roof racks or a permanent crossbar system, plus bow and stern tie-down lines to keep the board from shifting at highway speed.
By Bike or on Foot
A deflated inflatable board packed into its carry bag can be strapped to a bike rack or worn as a backpack for shorter distances — a genuine advantage over a hard board if your put-in spot doesn’t have close parking.
By Air
Inflatable boards packed in their travel bag generally check in as oversized luggage on most airlines, similar to golf clubs or skis, making them realistic to fly with on a paddling trip. A hard board essentially requires a dedicated board bag and specialty shipping, which is impractical for most travelers.
Comparing Transport Methods
| Method | Best Board Type | Practical Notes |
|---|---|---|
| Trunk or back seat | Inflatable, deflated | No racks needed; easiest option for most beginners |
| Roof rack / soft pads | Hard board, or inflated inflatable | Requires bow/stern tie-downs at highway speed |
| Bike rack or backpack carry | Inflatable, deflated in bag | Good for car-free access to a nearby put-in |
| Air travel (checked oversized luggage) | Inflatable, deflated in padded bag | Confirm sizing and fees with the airline beforehand |
Shop Carry Bags
20. Care, Storage & Repair
A little routine maintenance is the difference between a board that lasts a decade and one that develops leaks, delamination, or mildew within a season.
After Every Session
- Rinse the board and paddle with fresh water, especially after saltwater use, to prevent salt crystals from degrading seams and hardware.
- Dry the board completely before rolling or storing it — trapped moisture inside an inflatable board’s storage bag is a common cause of mildew.
- Release a small amount of air pressure if the board will sit inflated in direct sun, since heat expansion can stress the seams.
Long-Term Storage
Store inflatable boards deflated and loosely rolled in a cool, dry place out of direct sunlight; UV exposure is the single biggest cause of premature material breakdown. Hard boards should be stored on padded racks or slings, deck-up, away from direct sun and extreme temperature swings that can cause delamination.
Patching a Leak
Small punctures in an inflatable board are usually repairable with the vinyl patch kit that comes with most boards: clean and dry the area, apply adhesive to both the patch and the board, and let it cure fully — typically 12–24 hours — before reinflating. Keep a spare valve wrench and a tube of adhesive in your gear bag; a mid-trip patch job is far more common than most new owners expect.
Cleaning the Deck Pad and Hardware
The textured deck pad collects sand, sunscreen, and algae over a season, which can eventually make it feel slick rather than grippy. A soft brush with mild soap and fresh water restores traction without damaging the adhesive backing; avoid harsh solvents, which can degrade both the pad and the deck material underneath it. D-rings, fin boxes, and valve threads benefit from an occasional check for sand or grit buildup, since a jammed valve or a stuck fin is a common, easily prevented, on-the-water annoyance.
Off-Season Prep
Before storing a board for an extended off-season, give it a full clean-and-dry cycle, back off any straps or bungees that stay under constant tension, and store the fin separately if it’s a removable type to avoid stressing the fin box. A quick inspection when you pull the board back out — checking seams, the valve, and the deck pad for anything that changed while it sat unused — takes a few minutes and catches small issues before they become session-ending ones.
Shop Repair Kits
21. Best Places & Conditions to Paddle
Where you paddle shapes almost everything about the experience — the skills you need, the gear you carry, and how forgiving your mistakes will be.
| Water Type | Good For Beginners? | Watch Out For |
|---|---|---|
| Calm lake or pond | Ideal first choice | Afternoon wind buildup |
| Slow, wide river | Good with basic current awareness | Current speed, strainers (fallen trees) |
| Protected bay or harbor | Good in calm conditions | Boat traffic, tidal current |
| Open ocean coastline | Not recommended for beginners | Wind, swell, rip currents |
Best Time of Day
Mornings are usually the calmest window on lakes and coastal water, before thermal winds build through the afternoon. If you can only paddle later in the day, check a wind forecast rather than judging conditions from the shoreline, since wind often looks calmer from land than it feels once you’re out on open water.
Tides and Currents
On tidal water, check a tide table before launching — an outgoing tide can turn an easy paddle out into a difficult paddle back, especially near river mouths and inlets where current speed increases as the channel narrows. When in doubt, ask at a local paddle shop or marina; they’ll know which spots have currents strong enough to catch beginners off guard.
Finding Local Paddling Spots
State park websites, local paddle clubs, and outfitter shops are usually the fastest way to find beginner-appropriate water near you, since they know which launches have calm, protected conditions and which have currents or boat traffic better suited to experienced paddlers. Many public lakes and rivers list designated launch points with parking, and some require a small day-use or launch fee, along with a self-certification sticker confirming your gear has been cleaned to prevent spreading invasive species between waterways.
Sharing the Water
Popular put-ins get busy on weekends, and a little basic etiquette goes a long way: launch and land quickly so you’re not blocking the access point for others, give powered boats a wide berth since they have far less maneuverability than you do, and keep noise down near shoreline homes and campsites. Paddlers who are considerate of shared launch points tend to find those same spots stay open and welcoming for everyone.
22. Cold-Weather & Winter SUP
Paddle boarding doesn’t have to end when summer does — but cold water changes the risk profile enough that it deserves its own set of rules.
Dress for Water Temperature, Not Air Temperature
The single biggest mistake in cold-weather paddling is dressing for the air temperature on a sunny 60°F day while ignoring that the water underneath might be dangerously cold. As a general guideline, if the combined air and water temperature adds up to less than 120°F, a wetsuit or drysuit is strongly recommended, since cold-water immersion can cause incapacitating gasp reflex and rapid loss of muscle control within minutes.
| Water Temperature | Recommended Gear |
|---|---|
| Above 70°F | Swimsuit or rash guard |
| 60–70°F | Shorty wetsuit or thermal top |
| 50–60°F | Full wetsuit, neoprene booties |
| Below 50°F | Drysuit, neoprene gloves and hood |
Additional Winter Precautions
- Paddle with a partner and stay close to shore — solo cold-water paddling carries meaningfully higher risk.
- Carry a change of dry clothes and a towel in a sealed dry bag at your put-in point.
- Shorten sessions; cold saps energy and judgment faster than most paddlers expect.
- Check for ice at the shoreline and any partially frozen sections before launching.
Recognizing Cold-Water Stress
Cold immersion doesn’t always announce itself gradually — the initial “cold shock” response (an involuntary gasp and rapid breathing) hits within seconds of falling into cold water, followed by a steady loss of fine motor control in the hands over the following minutes, which is what actually makes swimming and self-rescue difficult in cold water, more than the cold itself. If you or a paddling partner start losing coordination, slurring words, or shivering uncontrollably, that’s a clear signal to get out of the water and into dry, warm layers immediately rather than trying to finish the outing.
Warming Up After a Cold Session
Change out of wet gear as soon as you’re off the water, even if you don’t feel cold yet — evaporative cooling continues working against you in wet clothing long after you’ve stopped paddling. Warm, non-alcoholic drinks and dry layers, ideally starting with a warm hat since heat loss through the head is significant, help your body recover its core temperature faster than simply sitting in a car with the heater on.
23. Getting Started with SUP Fishing
Fishing from a paddle board puts you closer to the water than a kayak and lets you access skinny water and shoreline spots a boat can’t reach — but it does ask more of your board and your balance.
Choosing a Fishing-Ready Board
Look for a wide, high-volume board — typically 34″ or wider — with a large, flat standing area and enough weight capacity to spare for a cooler, tackle, and rod. Many dedicated fishing SUPs add mounting points for rod holders, an anchor system, and gear tracks, which a general all-around board usually lacks.
Setting Up Your Deck
- Rod holders — flush-mount or clip-on holders keep rods secure while you paddle to a new spot.
- Anchor system — a small anchor and length of line let you hold position over a good spot instead of drifting off it.
- Milk crate or tackle box — a simple, secure way to organize gear on an otherwise open deck.
- Cooler with straps — doubles as extra flat seating for a break between casts.
Most anglers fish from a seated or kneeling position for stability while casting and fighting fish, standing only to paddle between spots. If you’re planning to fish regularly, our fishing SUP recommendations in the board types comparison above are a reasonable starting point before you commit to a purpose-built model.
Casting from a Standing Position
Casting while standing is manageable once your general balance is solid, but a wider stance than your normal paddling stance — feet closer to the rails than the centerline — gives a more stable base for the rotational movement of a cast. Many anglers keep the paddle within easy reach, laid flat across the deck, so they can brace with it if a hooked fish or a sudden gust throws off their balance mid-cast.
Best Times and Conditions for SUP Fishing
Early morning and late afternoon are generally the most productive windows for most freshwater species, and they also tend to be the calmest times of day on the water, which makes both fishing and paddling easier at the same time. Calm, sheltered water — coves, weed lines, and drop-offs along a shoreline — is typically easier to fish from a standing position than open, wind-exposed water, where staying upright takes priority over your cast.
Shop Fishing Accessories
24. Paddling Responsibly
Paddle boarding puts you in direct, quiet contact with shorelines and wildlife that motorized boats rarely reach — which comes with a responsibility to leave those places as good as you found them.
- Pack out everything — food wrappers, tape, and broken gear included, even on a short paddle.
- Give wildlife distance — nesting birds and basking wildlife along quiet shorelines are easily disturbed by a paddler drifting too close.
- Stay off sensitive shoreline vegetation — launch and land on durable surfaces like sand or gravel rather than trampling reeds or dune grass.
- Rinse your board between different bodies of water — this helps prevent spreading invasive aquatic species like zebra mussels or invasive algae between lakes.
- Respect local rules — some lakes and rivers restrict launch points or require self-certification for invasive species prevention; a quick check before you go avoids fines and protects the water for other paddlers.
None of this requires much extra effort — mostly just a bit of awareness — but it’s a meaningful part of keeping the quiet, low-impact places that make paddle boarding worth doing in the first place.
Sharing Water with Anglers and Other Boats
Anchored anglers and trolling boats have limited ability to move out of your way, so give them a wide berth rather than paddling directly through a line they’re actively fishing. On multi-use waterways, staying predictable — holding a steady line and signaling your intended direction with a raised paddle if needed — helps powered boats anticipate where you’ll be, which matters more than it might seem, since a paddle board is far quieter and harder to spot from a moving boat than another motorized craft.
25. Building Toward Intermediate Skills
Once flat-water paddling, basic turns, and simple chop feel routine, a handful of intermediate skills open up longer tours, faster boards, and more varied conditions.
The Pivot Turn
Stepping back toward the tail to lift the nose clear of the water and spinning the board on its tail — the pivot turn briefly mentioned earlier — is worth practicing deliberately in calm water until it’s reliable. It’s the fastest way to change direction and the foundation for surfing small waves back to shore, since catching a wave requires turning quickly to point the nose downwind or toward shore the moment a swell lifts the tail.
The Cross-Bow Turn
Rather than switching paddle sides to turn, the cross-bow turn reaches the paddle across the front of the board to the opposite side and sweeps it back toward the nose. It’s a faster, more efficient way to make sharp turns without breaking your paddling rhythm, and it becomes especially useful once you’re navigating tighter spaces — narrow channels, docks, or a crowded put-in.
Longer Tours and Racing
Displacement-hull touring boards — longer, narrower, and faster than an all-around board — open up multi-hour and multi-day tours once basic paddling feels effortless rather than effortful. Many paddling communities also host casual SUP races, which are a low-pressure way to meet other paddlers and get a sense of how much technique, rather than just fitness, contributes to speed on the water. Neither requires abandoning the all-around board you learned on; most paddlers keep a stable board for casual sessions and add a second, more specialized board once they know which direction their interest in the sport is heading.
Frequently Asked Questions
How long does it take to learn to paddle board?
Most beginners can stand and paddle confidently on flat water within their first 30–60 minute session. Comfortable turning and longer outings typically come within 2–3 sessions.
Do I need to know how to swim?
Yes. Basic swimming competence is strongly recommended, and a PFD should always be worn regardless of swimming ability.
Is an inflatable or a hard board better for beginners?
Inflatable boards are generally the better starting point — they’re more forgiving of bumps, easier to store, and typically just as stable as hard boards at beginner-friendly widths.
What size paddle board should a beginner buy?
Look for a board around 10’6″ to 11’6″ long and at least 32″ wide, which offers the stability most new paddlers need.
Can I paddle board alone?
Yes, but tell someone your route and return time, stick to calm, familiar water, and always wear a leash and PFD.
How much does a paddle board cost?
Beginner-friendly inflatable packages generally range from budget options up to premium touring setups; comparing a few models against your intended use is the best way to land on value.
Do paddle board paddles float if I drop them?
It depends on the material — some do, some don’t. Our paddle flotation guide covers which materials sink.
What should I wear paddle boarding?
Quick-dry athletic wear or a swimsuit works well in warm weather; a wetsuit is recommended in cold water regardless of air temperature.
How do I get back on the board after falling?
Swim to the center handle, kick your legs to the surface, and pull yourself up using the same technique as the initial climb-on.
Is paddle boarding a good workout?
Yes — it engages the core, legs, shoulders, and back simultaneously, and a steady session burns a comparable number of calories to a brisk hike.
What’s the difference between SUP and a regular paddle board?
“SUP” and “paddle board” are generally used interchangeably today; any historical distinctions are covered in our SUP vs. paddle board comparison.
Can kids paddle board?
Yes, with a properly fitted PFD, close supervision, and a stable, wide board suited to their weight.
Can my dog come paddle boarding with me?
Yes — most dogs adjust well to a wide, stable board after a short introduction on dry land and in shallow water, and a dog-specific PFD with a lift handle makes recovery easy if they fall in.
Is it safe to paddle board in windy conditions?
Winds under 10 mph are generally manageable for beginners; above 15 mph, stick to sheltered water and always paddle into the wind first so it helps carry you home.
How do I fix a leak in my inflatable paddle board?
Clean and dry the punctured area, apply the included vinyl patch kit’s adhesive to both surfaces, and let it cure for 12–24 hours before reinflating.
Should I rent or buy my first paddle board?
Renting for your first several outings is the smarter move — it lets you try different board widths and styles before committing to a purchase.
Can you paddle board in cold weather?
Yes, with the right gear — a wetsuit or drysuit matched to water temperature, and shorter sessions closer to shore with a paddling partner.
What’s the fastest way to turn a paddle board?
The pivot turn — stepping back to lift the nose and spinning the board on its tail — is the quickest way to change direction once you’re comfortable with basic sweep strokes.
Is SUP fishing harder than fishing from a kayak?
It asks more of your balance since you’re standing rather than seated, but a wide, high-volume fishing SUP with an anchor system makes it very manageable, and many anglers fish seated or kneeling for extra stability.
Ready to Get on the Water?
Paddle boarding rewards patience more than power — get the balance basics right in calm, shallow water, and everything else builds naturally from there. Pick a stable all-around board, wear your leash and PFD, and give yourself one full session just to get comfortable standing before worrying about speed or distance.
Shop Beginner Paddle Boards on Amazon