How to Transport a Paddle Board: The Complete Guide for Every Vehicle and Board Type
From roof racks and truck beds to folding your inflatable into a backpack, here’s exactly how to get your board from garage to water without damage, drama, or a ticket.
Buying a paddle board is the easy part. Getting it to the water in one piece — without scratching your car, losing it on the highway, or throwing your back out — is where most people run into trouble. Whether you’re driving a sedan with no rack, a pickup truck, or you’ve gone inflatable specifically to dodge this problem altogether, this guide walks through every realistic transport method, the gear each one requires, and the mistakes that cause the most damage and the most tickets. If you haven’t nailed down the basics of paddling yet, our guide on how to paddle board is a good companion read once your board is safely on the water.
Why Proper Transport Matters
A paddle board is long, light, and shaped like a sail — which makes it uniquely bad cargo. At highway speed, an improperly secured board doesn’t just risk minor cosmetic damage; it can act like a wing, lifting under airflow and putting serious stress on straps and roof rack hardware. Every year, boards come loose on highways, and the results range from a cracked hull to a genuinely dangerous road hazard for the cars behind you.
Beyond safety, transport is also where boards actually get damaged most often — more than from use on the water. Rack rash (the scuffing that happens when a board flexes against rack pads), pressure dents from over-tightened straps, and sun damage from being strapped down uncovered for hours all happen during the drive, not the paddle.
There’s also a cost dimension that’s easy to overlook. A quality touring or all-around hard board can run several hundred to well over a thousand dollars, and a single scrape against a garage doorframe or a strap that cuts a groove into the rail can knock real resale value off the board, even if it’s purely cosmetic. Treating transport as seriously as you’d treat storing any other piece of sports equipment worth that much protects the investment, not just the paddling experience.
Then there’s the simple matter of trip reliability. Nothing ends a planned lake day faster than arriving at the water to find a strap failed en route, a fin got knocked loose in the truck bed, or — in the worst case — the board itself came off the roof somewhere on the interstate. A five-minute pre-drive check, covered later in this guide, eliminates the overwhelming majority of these scenarios before they happen.
The good news: once you understand the mechanics of why boards move, flex, and lift in transit, securing one properly becomes a five-minute routine rather than a guessing game. That’s what the rest of this guide covers, method by method, vehicle by vehicle, so you can find the section that actually applies to your setup rather than wading through advice meant for a different kind of car or board.

Start with the right foam blocks. A quality set of rack pads is the single cheapest upgrade you can make to protect your board on every drive.
Shop Roof Rack Pads →Transport Methods Overview
There isn’t one “correct” way to transport a paddle board — the right method depends on your vehicle, your board type, and how far you’re driving. Before diving into the step-by-step instructions, here’s how the main options compare at a glance.
| Method | Best For | Approx. Setup Cost | Distance Suitability |
|---|---|---|---|
| Roof rack + straps | Hard boards, SUV/sedan owners | $50–$250 | Any distance |
| Truck bed | Pickup owners, short hauls | $0–$60 | Local to medium |
| Deflate & bag (inflatable) | Any vehicle, even no vehicle | Included with board | Any distance, flight-friendly |
| Soft roof rack | No factory rack, occasional use | $30–$80 | Local to medium |
| Trailer / SUP cart trailer | Multiple boards, frequent trips | $300+ | Any distance |
Our related comparison on SUP boards vs. paddle boards and the breakdown of paddle board types are useful background if you’re still deciding which board to buy — board type has a big influence on which transport method makes sense.
A few general rules apply across every method in the table above. First, weight matters more than length for most transport decisions — a 35 lb touring board changes the calculus on solo roof-rack loading in a way that a 20 lb inflatable never will. Second, frequency of use should drive how much you invest in a permanent solution: someone paddling every weekend all summer benefits enormously from a dedicated roof rack, while someone taking two trips a year is often better served by renting a rack or leaning on a soft rack system instead. Third, and often overlooked, is where you’re actually parking day to day — a permanent roof rack on a car that also goes into a low parking garage regularly is a recipe for a very expensive surprise.
Best Transport Method by Vehicle Type
Most people searching for this topic aren’t asking a general question; they’re asking how to transport a paddle board on their specific car. Use this table to match your vehicle to the setup that works best, then jump to the matching section for the full walkthrough.
| Vehicle | Hard Board Setup | Inflatable Setup | Watch Out For |
|---|---|---|---|
| Sedan | Soft rack or clip-on crossbars | Trunk or back seat, in the bag | Door-frame straps can pinch weatherstripping |
| Hatchback / compact | Soft rack blocks | Rear cargo area | Lower roof load ratings; keep boards light |
| SUV / crossover with rails | Crossbars with pads or cradles | Cargo area, no rack needed | Tall roofline makes solo loading harder |
| Minivan | Crossbars on roof rails | Behind the second row | Keep straps clear of sliding-door tracks |
| Pickup truck | Bed with padding and flag, or a bed rack | Back seat or bed | Slippery bed liners; rear overhang |
| Jeep / soft top / convertible | Hitch-mounted carrier | Inflatable in the bag | Soft tops and roll bars aren’t built to carry roof loads |
Roof Rack Types Compared
If you’re buying a rack for the first time, the style you choose affects loading effort, capacity, and how well the board is protected. These are the main options.
| Rack Style | How It Holds the Board | Best For | Trade-Off |
|---|---|---|---|
| Foam blocks / pads on crossbars | Board lies flat, deck up or down | One or two boards, lowest cost | Relies entirely on straps for security |
| J-cradles | Board rides on its rail | Saving roof width for other gear | Harder to load solo, and rail contact needs padding |
| Stackers / saddles | Boards sit spaced apart on shaped supports | Two to four boards | Higher price and more height |
| Hitch carrier | Board rides behind the vehicle | Cars with weak or no roof support | Blocks lights or rear access if poorly placed |
| Soft rack | Foam blocks strapped through the doors | Occasional use, no rack installed | Not ideal for long highway hauls or heavy boards |
As a rule of thumb, paddle every week and you’ll appreciate a permanent rack with cradles. Paddle a handful of times a year and a soft rack or an inflatable is usually the smarter spend.
Roof Rack Transport (Hard Boards)
A factory or aftermarket roof rack with crossbars is the gold standard for transporting a hard (epoxy or fiberglass) paddle board. It keeps the board’s weight off your body, off the interior, and distributes load evenly across the vehicle’s roof.
What You Need
- Two crossbars mounted to factory rails or a bare-roof clip system
- A pair of foam rack pads or J-cradles sized to your crossbar width
- Two cam-buckle tie-down straps (12–15 ft, rated at least 400 lbs working load)
- One bow and stern line (optional but recommended above 45 mph or on long hauls)
Center the board fin-up or fin-down depending on your rack style — most flat cradle pads want the board deck-down with the fin removed or padded separately, while J-cradles cradle it on its rail (side). Check your board manufacturer’s guidance if you’re unsure, since epoxy boards can develop pressure dents if left resting on a hard point for a long drive.
Choosing Crossbar Spacing
Crossbar spread has a bigger effect on stability than most people realize. A narrow spread — under about 24 inches — lets a long board flex and bounce over rough pavement, which is both uncomfortable to watch in your mirrors and genuinely harder on the board’s core over hundreds of trips. Where your rack system allows it, aim for at least 28–32 inches between bars for anything over 10 feet long. If your factory crossbars are fixed and narrow, some rack brands sell wider aftermarket bars specifically for long, flexible cargo like SUPs and kayaks.
Loading Solo vs. With a Partner
Two people can simply lift a board flat and set it on the pads. Loading solo is a different exercise entirely, and it’s where most shoulder strain and dropped-board dings happen. The safer solo technique is to rest one end of the board on the rear bumper or a step stool, walk to the other end, lift and slide it forward along the roofline until it’s centered, rather than attempting a single dead lift from the ground to overhead. A padded tailgate pad or a set of temporary roller cups (inexpensive foam wheels that clip onto a rear crossbar) make solo loading dramatically easier if you’re doing it several times a week.
Pros
- Most stable option at highway speed
- Keeps the board off passengers and interior
- Works for boards up to 12–14 ft with the right bar spread
Cons
- Requires factory rails or crossbar mounting points
- Lifting a heavy board overhead solo can be awkward
- Upfront cost if you don’t already have a rack

Cam-buckle straps beat ratchet straps for SUPs. Ratchets can easily over-tighten and dent a board’s hull — cam buckles give you controlled, even pressure.
Shop Cam Straps →Board Orientation, Roof Load Limits & Clearance
Three details separate a solid setup from a risky one, and most guides skip all of them.
Which Way Should the Board Face?
Rack makers and board manufacturers don’t fully agree here. Some recommend the fin end toward the front of the vehicle, while others prefer the rounded nose forward to cut drag. Neither camp is universally right, so start with your board maker’s guidance and your rack’s instructions. Whichever direction you choose, remove or pad the fin, seat the board the way your cradles expect (flat or on its rail), and keep the orientation consistent from trip to trip so you learn how it behaves. Bow and stern lines matter far more than orientation for preventing nose lift.
Know Your Roof’s Load Rating
Every vehicle roof has a dynamic load rating, which is the weight it can carry while moving. You’ll find it in the owner’s manual, and it commonly falls somewhere between 100 and 165 lbs for cars and SUVs. Your crossbars have their own rating too, and the lower of the two numbers is your true limit. Most single boards weigh well under 45 lbs, so weight is rarely the issue with one board, but a stack of two or three boards plus a kayak can approach the limit quickly.
Check Your Clearance
A rack plus a board adds noticeable height. Parking structures, drive-thrus, and your own garage door are the classic places boards get crushed or ripped off. If you park under a low ceiling regularly, tape a reminder to the dashboard or sun visor whenever a board is loaded. It costs nothing and prevents one of the most expensive mistakes in paddle sports.
- Read the roof load rating in your owner’s manual before your first trip
- Confirm crossbars are rated for the combined weight of boards and gear
- Measure your loaded height and note it somewhere visible
Truck Bed Transport
If you’re driving a pickup, the bed is often the simplest option for a single board, especially for short local trips to a nearby lake or beach. The board sits low, is easy to load, and doesn’t require overhead lifting.
Loading It Right
Lay a moving blanket, foam pad, or the board’s own bag across the bed floor first — truck bed liners and tie-down hooks can scuff the hull if the board shifts even slightly. Angle the board diagonally if your bed is shorter than the board (most beds run 5.5–6.5 ft while boards run 10–12 ft), and use a tailgate strap, cargo net, or a simple red safety flag on the overhanging end, which is legally required in most states when cargo extends past the bumper.
Run two straps from the front of the board to the front bed tie-downs, and one strap or a ratchet-secured tailgate to stop it from sliding backward under braking. Never rely on the tailgate alone to hold the board in place.
If you’re hauling gear alongside the board — coolers, life jackets, a beach chair — load the board first so it sits against the cab wall, then pack softer items around and on top of it within the bed rails rather than stacking anything heavy directly on the board’s deck. Bungee cargo nets work well as a secondary layer over loose gear, but they should never be the only thing holding the board itself in place; nets stretch and shift in ways rated tie-down straps don’t.
One detail specific to truck beds: spray-in and drop-in bed liners can actually be more slippery than bare metal once wet, since they’re often textured for grip against boots and gear rather than against a smooth fiberglass hull. A folded moving blanket or a purpose-made bed mat under the board solves this and also prevents the liner’s texture from leaving faint scuff marks on the board’s bottom over repeated trips.
| Truck Bed Length | Fits Boards Up To | Overhang Handling |
|---|---|---|
| Short bed (~5.5 ft) | ~11 ft diagonally | Flag required for boards over ~11 ft |
| Standard bed (~6.5 ft) | ~12 ft diagonally | Flag recommended for boards over 12 ft |
| Long bed (~8 ft) | ~14 ft diagonally | Rarely needed |
Deflating & Bagging an Inflatable SUP
This is the reason a huge number of paddlers switch to inflatables in the first place — an inflatable board packs down into a backpack-sized roll that fits in a trunk, a closet, or an overhead bin. If you’re weighing hard vs. inflatable, our guide on whether inflatable paddle boards are good for beginners covers the trade-offs in more depth.
The appeal isn’t just theoretical — it removes almost every transport headache covered in the roof-rack and truck-bed sections above. There’s no rack to buy, no lifting a heavy board overhead, no risk of rack rash, and no need to worry about overhang flags or bumper-height clearance in a parking garage. The trade-off is a short setup and teardown routine at each end of the trip, which the steps below streamline as much as possible.
Step 1 — Deflate Fully Before Rolling
Open the valve completely and press down along the board from the nose toward the valve to push out as much air as possible before you start rolling. Rolling a partially inflated board causes uneven creasing and takes far more effort.
Fig. 1 — Press residual air toward the open valve before rolling.
Step 2 — Roll From the Nose, Not the Sides
Fold the board in half lengthwise valve-side out if your bag requires it, or roll straight from the nose toward the tail on a flat, clean surface. Keep the roll tight and even — a loose roll won’t fit the bag and a lopsided one stresses the seams unevenly over repeated trips.
Fig. 2 — A tight, even roll from nose to tail packs smallest and stresses seams least.
Step 3 — Pack the Bag in the Right Order
Place the rolled board in first against the back panel, then the fins, pump, and paddle pieces around it, and finally straps or a repair kit in the top pocket. Packing heavy items (the pump) against your back when you carry it keeps the load comfortable if you’re hiking any distance to the water.
Take a moment to also double-check the valve cap is threaded on before you seal the bag — a loose valve cap rattling against the rolled material on a long drive can wear a small dimple into the surrounding fabric over time. If your bag has a dedicated fin pocket, use it rather than laying fins loose against the rolled board, since fin edges are the single most common cause of small nicks and scuffs on the material during transport.
Fig. 3 — Layer heavy items toward the back panel for a balanced carry.

A wheeled bag changes everything if you’re hauling from a parking lot to the shoreline. Worth the upgrade over a standard backpack strap bag.
Shop Wheeled SUP Bags →Transporting a Paddle Board Inside a Car, Van or RV
Getting the board off the roof entirely removes wind, weather, and height problems. It only works for certain boards and vehicles, so here’s what’s realistic.
Inflatables Inside Any Car
A deflated, rolled inflatable is roughly the size of a large duffel bag. It fits in a sedan trunk or across a back seat, and it’s the only option that works with nearly every vehicle. Place it flat and keep the pump, fins, and paddle pieces from pressing against the rolled material.
Hard Boards Inside a Vehicle
Only very short or children’s hard boards fit inside a standard SUV or minivan with the seats folded. Cargo vans, or vans with a passenger seat folded forward, can take longer boards. Any hard board carried inside should be strapped to the cargo anchors, because an unrestrained board becomes a projectile in a hard stop.
Hitch-Mounted Carriers
Hitch racks hold boards behind the vehicle and suit owners whose roofs can’t take a load. Watch for blocked tail lights or license plates, reduced ground clearance on ramps, and boards that overhang the bumper by enough to need a flag.
RVs and Campers
Many RV roofs are not designed to bear weight, so confirm with the manufacturer before mounting anything. Rear ladder racks and bumper carriers are common alternatives, and an inflatable stored in a bay or closet solves the problem outright.
No Roof Rack? Soft Rack Systems
If your car has no crossbars or rails, a soft (temporary) rack system is the next best thing. These use foam blocks with straps that run through the car doors, gripping the door frames instead of a permanent rack.
Step 4 — Position the Foam Blocks
Set the two foam blocks across the roofline where the door frames are strongest — typically just behind the front doors and just ahead of the rear doors. Uneven spacing puts more stress on one strap than the other.
Fig. 4 — Foam blocks sit over reinforced door-frame areas, not the center of the roof panel.
Run each strap through the open door, over the block, back down through the opposite door, and close both doors on the straps before cinching. Tug-test each door afterward — if a door pops open under a firm pull, the strap isn’t seated correctly against the frame.
Trailer Transport
For paddlers hauling multiple boards regularly — outfitters, instructors, or families with three or four boards — a small utility trailer with a SUP rack insert removes the daily loading hassle entirely. It’s the highest upfront cost option but the lowest effort per trip, since boards can often stay strapped in the garage between uses.
Look for a trailer rack with adjustable vertical or horizontal slots so board widths and thicknesses don’t matter, and make sure the trailer’s own tail lights and load rating are legal for the total weight of boards plus gear.
Transporting Multiple Boards
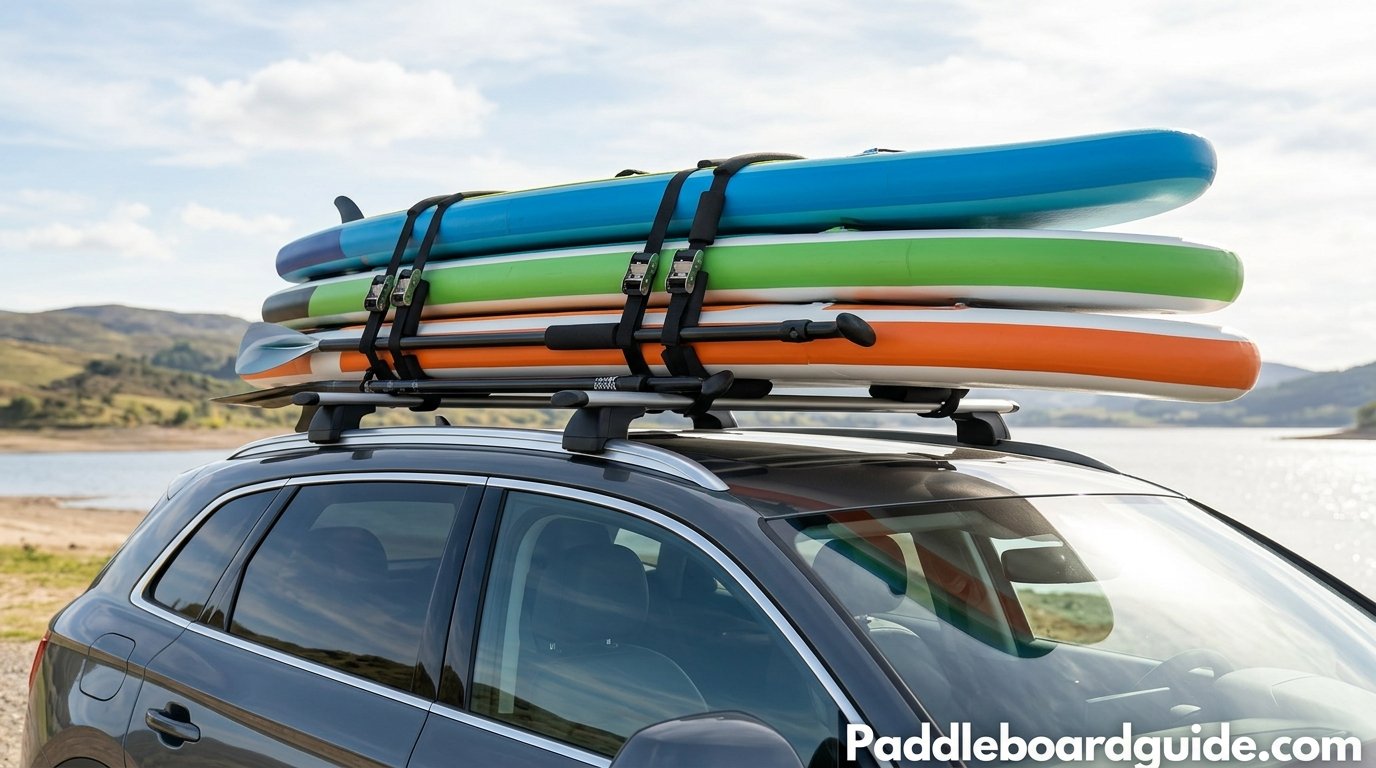
Stacking boards for a family trip introduces its own set of rules. Always place boards deck-to-deck or nested by curve so fins and rails don’t grind against each other, and put a foam noodle, pool float, or dedicated stacking pad between each layer.
- Heaviest board goes on the bottom, closest to the rack pads
- Alternate nose direction on stacked boards if your rack style allows it, for better balance
- Use one strap per board minimum, plus a single “master” strap wrapping the whole stack
- Recheck strap tension after the first 10–15 minutes of driving — stacks settle

A dedicated multi-board stacker spaces boards automatically and cuts loading time roughly in half versus stacking loose foam blocks.
Shop SUP Stackers →Strapping It Down: Step-by-Step
This is the step most people rush — and the one most responsible for boards coming loose. Whichever method you’re using above, the strapping technique itself is nearly identical.
Step 5 — Center the Board Over the Crossbars or Pads
Line the board up so roughly equal length overhangs the front and back, and confirm it’s sitting flat with no twist across the rack.
Fig. 5 — Equal overhang front and back keeps weight balanced on both crossbars.
Step 6 — Cross the Straps Over the Top
Feed each strap over the board, down through or around the crossbar, and back up to the buckle so the strap forms a loop that traps the board against the pad. Do not let straps run parallel and loose — a proper wrap holds the board down even if one strap loosens slightly.
Fig. 6 — Straps wrap fully around the crossbar, not just across the board’s top surface.
Step 7 — Tighten to “Firm,” Not “Maximum”
Pull each strap until the board stops shifting side to side, then stop. You should be able to press a thumb into the rail without the strap cutting a visible groove. Over-tightening is the single most common cause of pressure dents on epoxy boards.
Fig. 7 — Firm and even beats maximum and crushing.
Step 8 — Add Bow and Stern Lines for Highway Speed
For any drive over roughly 45 mph or longer than 20 minutes, run an additional short line from the nose and tail of the board down to the vehicle’s tow hooks or bumper anchor points. This stops nose-lift, which is the specific failure mode that causes most in-transit board losses.
Fig. 8 — Bow and stern lines neutralize the lift that highway airflow creates.
For a full breakdown of what’s actually required by law in your state — reflective flags, load limits, and more — see our guide to paddle board safety requirements.
Stopping Strap Hum, Flap & Rack Noise
That loud buzzing on the highway isn’t just annoying. Vibrating straps wear faster and can loosen over a long drive. Fortunately, the fixes are quick.
- Put one or two full twists in the flat section of each strap between the crossbar and the board; the twist breaks up the vibration
- Tie or wrap loose strap tails so they never flap against the board, mirrors, or paint
- Position buckles beside the board on a cushioned spot rather than resting on the deck or rail, where they can scratch or dent
- Keep straps away from antennas, wipers, and roof-mounted sensors
- Listen for new sounds after the first few miles; a change usually means a strap has loosened
Rack noise is a separate issue. Bare crossbars can whistle at speed, and a wind fairing or an end cap can quiet them. If the noise continues with no board on the roof, the rack itself needs attention, not the straps.
Heat, Salt & Moisture: Caring for Your Board Before and After the Drive
Damage in transit isn’t always mechanical. Heat, salt, and trapped moisture cause quieter problems that show up weeks later.
Inflatables in Hot Cars
Air expands as it warms, so a fully inflated board left in a sun-baked car or on hot pavement can become overpressurized and stress its seams. If you’re leaving an inflated board in the sun before a paddle, let a little air out and top it back up in the shade. For longer drives, deflate and bag it. Our guide on how long inflatable paddle boards last explains why heat exposure is one of the biggest lifespan factors.
Hard Boards in Heat
Epoxy and fiberglass boards can develop bubbles or soft spots when they sit in intense heat for long periods. Cover the board with a light-colored sock or towel on hot days, and avoid leaving it on the roof in a sun-drenched parking lot for hours.
Salt, Sand & Rinsing
After a saltwater paddle, rinse the board, fin, valve, and straps with fresh water before loading up. Salt left on hardware corrodes it, and salt crystals on a strap act like sandpaper against the board. Rinse the leash and paddle too.
Dry Before You Pack
A damp board bagged for the ride home invites mildew and odor. Towel it down at the ramp, and unroll and air-dry an inflatable at home as soon as you can. Our inflatable paddle board storage ideas covers what to do once you’re back.
Unload and Inspect
Before you put the board away, run a hand along the rails and deck for dings. Catching a small scrape immediately makes it a quick fix; see how to patch a paddle board if you find one.
Protecting Your Board in Transit
Straps stop a board from moving, but they don’t stop it from getting scuffed, sun-baked, or scratched by debris. A board bag or at minimum a nose/tail protector pad adds a real layer of defense, especially on gravel roads or long highway stretches where grit kicks up off the road.
Worth Doing
- Use a padded board sock or full travel bag on long trips
- Cover exposed deck pads/fins with a towel on hot-pavement days
- Check strap wear points every few trips — fraying near buckles is the first sign of failure
Skip This
- Leaving a board strapped down uncovered in direct sun for hours
- Using old, sun-faded straps past their rated lifespan
- Storing a wet board rolled up for transport — dry it first
If you’re storing a board between trips rather than using it immediately, our inflatable paddle board storage ideas guide covers keeping it in good shape long-term, and if transit damage does happen, how to patch a paddle board walks through fixing dings and small punctures.

A padded travel bag pays for itself the first time it saves your board’s rails from a parking-lot scrape or road grit on a long drive.
Shop SUP Travel Bags →How to Carry a Paddle Board on Land
Every trip includes a walk between the vehicle and the water, and that’s where many boards get dropped, dinged, or blown out of someone’s hands. These are the carries that work.
The Handle Carry
Find the center carry handle, grip it, and tuck the board under your arm with the rail against your hip and the deck facing your body. Keep the nose angled slightly up and the fin side facing away from your legs. This is the most common one-person carry and works well for boards under about 12 ft.
The Shoulder Carry
For longer walks, lift the board with the handle, rotate it onto its rail, and rest the rail on your shoulder while steadying it with one hand. Carry your paddle in the other. A shoulder carry spreads the load and frees your arm for balance.
The Two-Person Carry
One person takes the nose and one takes the tail, both holding the rails. Two people make heavy touring and race boards far easier, and they keep the board level over stairs and uneven ground.
Wind Changes Everything
A board is a big flat surface, and a gust can twist it out of your grip. Carry it with the nose pointed into the wind when you can, and set it down flat rather than fighting a strong crosswind.
SUP Carts and Wheeled Bags
If the walk is more than a few hundred feet, a wheeled cart for hard boards or a wheeled bag for inflatables saves your shoulders. Choose wheels wide enough for sand and gravel, and strap the board down so it can’t slide.
- Never carry a board by the fin or the leash
- Lift over sand and rocks instead of dragging
- Set the board down on grass or a towel, not on gravel
No Car? Bike, Bus & Train Options
Plenty of paddlers live near water and never touch a roof rack.
By Bike
Bike trailers designed for kayaks and paddle boards tow a hard board behind you, and they work best on flat, low-traffic routes. Check the trailer’s weight and length limits first. Many cyclists find it simpler to carry a deflated inflatable in a backpack or panniers instead, which eliminates the trailer completely.
By Bus, Train or Subway
A rolled inflatable in its bag counts as a large piece of luggage on most systems. Hard boards are frequently restricted or banned, especially at rush hour, so check the operator’s rules before you go.
By Rideshare
A deflated inflatable fits in most trunks. A hard board generally won’t, and a driver may decline it, so plan on an inflatable if rideshare is your main option. Our roundup of the best inflatable paddle boards is a good place to start if portability is your priority.
Flying With a Paddle Board
Air travel is the strongest argument for owning an inflatable. Here’s how the two board types compare.
| Board Type | How Airlines Usually Treat It | What to Expect |
|---|---|---|
| Inflatable in a travel bag | Standard or oversize checked baggage | Weight is the main issue; many bags land near the standard weight limit |
| Hard board in a padded bag | Oversize or special sporting item | Higher fees; some carriers restrict length or refuse boards |
| Paddle (3-piece) | Fits in the board bag or a checked bag | Pack shafts and blades so they can’t crack in transit |
Policies change often, so confirm your airline’s sporting-equipment rules for weight and length before booking, and again before you head to the airport.
Packing an Inflatable for Flights
- Fully deflate and roll tightly; a compact roll is easier to handle at check-in
- Weigh the packed bag at home and shift heavy items to a carry-on if it’s over the limit
- Keep sharp fin edges away from the rolled material
- Carry battery-powered pumps in your carry-on, since lithium batteries generally can’t go in checked bags
- Skip CO2 cartridges unless your airline specifically allows them
- Tag the bag inside and out, and photograph the contents before closing it
Hard Boards and Air Travel
Hard boards need a padded travel bag with reinforced nose and tail protection, and some airlines require advance notice. Because of the cost and damage risk, most travelers rent a board at their destination instead.
Long-Distance Road Trips & Overnight Security
Highway hours put a much bigger strain on a rack setup than a short drive to a local lake.
- Expect lower fuel economy; a loaded roof rack adds drag, especially at highway speed
- Recheck straps at every fuel stop, not just once early in the drive
- Slow down in crosswinds and gusty conditions, where a board acts like a sail
- Use locking crossbars or a cable lock through the board’s handle when stopping in public
- Never leave a board on the roof overnight in a hotel lot; bring it inside or lock it in a secured space
If you’re planning a trip around good paddling conditions, our guide to the best time to paddle board can help you pick dates and destinations.
Long and Race Boards (12’6″ to 14′)
Longer touring and race boards flex more between crossbars and overhang more at each end, so the rules tighten up. Use the widest crossbar spread your rack allows, always run bow and stern lines, and attach a flag to any overhang past the bumper. In a pickup, a long board almost always needs a bed extender or a roof rack, because a short bed can’t support enough of its length. Two people are strongly recommended for loading, since a long board is awkward to lift and easy to twist.
What Setup Costs in Practice
A basic hard-board setup, meaning crossbars, pads, and two cam straps, usually lands between $100 and $250. A soft rack setup is far cheaper, and an inflatable board costs nothing extra because the bag is included. Frequent paddlers should budget for replacement straps every couple of seasons and for a padded board sock, both of which are small costs next to a damaged board.
Legal Requirements & Road Safety
Most regions treat an overhanging paddle board the same as any other extended load: anything sticking out more than roughly 4 feet behind the vehicle typically needs a red flag or reflector during daylight, and a red light at night. Requirements vary by state and country, so it’s worth a quick check locally if you’re regularly hauling a board that overhangs your bumper.
Beyond flags, a quick pre-drive checklist takes less than a minute and catches the majority of issues before they become a problem on the highway:
- Both straps tight and buckles fully seated
- No loose strap tails flapping near mirrors or exhaust
- Bow/stern lines attached for highway speed drives
- Board centered with no visible twist across the rack
- Reflective flag attached if the board overhangs the bumper
Full Transport Checklist: Before, During & After
Before You Leave
- Fin removed or padded, and leash coiled and stowed
- Rack pads clean and free of grit that could scratch the board
- Straps inspected for fraying and fading
- Paddle, pump, life jacket and safety gear packed
During the Drive
- Recheck strap tension after the first 10–15 minutes
- Listen for new vibration or humming
- Watch for wind and reduce speed when needed
After You Arrive
- Rinse the board, straps, and hardware, especially after saltwater
- Dry everything before packing it away
- Inspect rails and deck for dings, and store the straps out of the sun
For the on-water safety gear that goes with this checklist, see our paddle board safety requirements.
Common Mistakes to Avoid
| Mistake | Why It’s a Problem | Fix |
|---|---|---|
| Using ratchet straps instead of cam straps | Easy to over-tighten, dents the hull | Switch to cam-buckle straps rated for the load |
| Skipping bow/stern lines on the highway | Allows nose-lift at speed | Add short safety lines to bumper anchors |
| Loading the board fin-first into wind | Increases drag and strap stress | Check manufacturer orientation guidance for your rack style |
| Not rechecking straps after 10–15 minutes | New straps and loaded racks settle | Pull over briefly and re-tighten once early in longer drives |
| Rolling an inflatable board while still wet | Promotes mildew and material stress | Dry fully before rolling for transport or storage |
Don’t forget your paddle in all this — it’s easy to toss loose in the trunk, but a proper paddle bag or roof-rack paddle clip keeps it from sliding around and cracking a shaft joint. See our picks for best paddle board paddles, and if you’ve ever wondered whether a dropped paddle sinks, we cover that in do paddle board paddles float.
Frequently Asked Questions
Can I transport a paddle board without a roof rack?
Yes. A soft rack system using foam blocks and door-anchored straps works well for occasional trips, and an inflatable board sidesteps the issue entirely by rolling into a backpack that fits in a trunk or back seat.
How fast can I drive with a paddle board on the roof?
Most properly strapped boards with bow and stern lines handle typical highway speeds fine, but it’s smart to reduce speed somewhat in high wind or gusty conditions, since crosswinds add extra lateral force on a board’s large surface area.
Do I need a flag if the board overhangs my bumper?
In most states, cargo overhanging significantly past the rear bumper requires a visible flag or reflector, especially at night. Check your specific state’s overhang rules, since the exact distance threshold varies.
Will roof rack straps damage my board?
Not if they’re tightened correctly. Cam-buckle straps pulled to “firm, no visible groove” tension protect the board fine over thousands of trips — the damage usually comes from over-tightening with ratchet straps, not the straps themselves.
Can two paddle boards fit on one roof rack?
Yes, most standard crossbar setups handle two boards side by side or stacked with spacers between them, as long as total weight stays within your rack’s rated capacity.
Is it safe to leave a board strapped to the roof overnight?
Mechanically it’s usually fine for one night if secured properly, but it’s not ideal — prolonged sun exposure and dew moisture are better avoided by bringing the board inside when you’re not actively traveling.
How do I transport a paddle board on a small hatchback?
A soft rack system is typically the best fit, since hatchbacks rarely come with factory crossbars. Alternatively, an inflatable board rolled into its carry bag fits easily in a hatchback’s rear cargo area.
What’s the safest way to load a board onto a tall SUV roof solo?
Load from the rear of the vehicle using the back bumper or a step stool as a staging point, sliding the board up and forward rather than lifting it fully overhead from a standstill.
Can a paddle board fit inside a car instead of on the roof?
Only if it’s an inflatable board rolled down, or a very short hard board with seats folded flat. Most hard touring or all-around boards are too long to fit inside a standard car.
How often should I replace my tie-down straps?
Inspect straps every few trips for fraying, UV fading, or stitching wear near the buckle, and replace them roughly every couple of seasons of regular use, or immediately if you see any visible damage.
Do inflatable boards need any special transport precautions once deflated?
Make sure the board is completely dry before rolling to avoid mildew, and avoid packing anything sharp against the rolled material inside the bag.
What’s the difference between J-cradles and flat foam blocks?
Flat foam blocks support the board lying deck-down or deck-up across the crossbars, while J-cradles hold it on its side (on-edge), which can save roof space if you’re also carrying kayaks or other gear on the same rack.
How do you carry a paddle board by yourself?
Grip the center handle, rest the board on its rail against your hip, and tilt the nose slightly upward. For longer walks, move it to a shoulder carry, and use a cart if the distance is long or the board is heavy.
Which way should the fin face on a roof rack?
Practice varies by manufacturer, so follow your board’s and rack’s guidance. Whichever direction you use, pad or remove the fin, and add bow and stern lines to prevent nose lift.
Can you fly with a paddle board?
Yes, and an inflatable in a bag is far easier than a hard board. Confirm your airline’s weight and size limits, carry battery-powered pumps in your carry-on, and pack the board fully deflated.
Can I put a paddle board inside my car with the seats down?
Only very short hard boards fit in most cars. Inflatables fit easily, and any board carried inside should be strapped down.
Is it safe to leave an inflatable paddle board in a hot car?
It’s best to avoid it. Heat expands the air inside and stresses seams, so deflate the board or release some air before leaving it in direct sun.
How do I stop my straps from humming on the highway?
Add one or two twists to the flat section of the strap between the crossbar and the board, and secure the loose tails. The twist disrupts the vibration that causes the noise.
Can I put a paddle board on an electric vehicle with a glass roof?
Often yes, but only with crossbars approved for your model, and within the roof load rating in the owner’s manual. Never clamp directly onto glass, and check the manufacturer’s guidance first.
Should I rinse my board and straps before driving home?
Yes, especially after saltwater. Rinsing prevents salt from corroding hardware and abrading straps, and it lets you dry the board before it goes into a bag or onto the roof.
How much does it cost to set up a roof rack for a paddle board?
A basic setup with crossbars, foam pads, and two cam straps commonly runs $100 to $250. A soft rack costs much less, and an inflatable board needs no rack at all, so frequency of use should decide how much you spend.
How far can a paddle board overhang before I need a flag?
Rules vary by state and country, but a board extending several feet past the rear bumper typically needs a red flag or reflector. Check your local regulations, and use a flag any time the overhang is obvious to drivers behind you.
Do I need bow and stern lines on a short local drive?
They’re strongly recommended for anything above city speeds. Even on short trips, a sudden gust or hard brake can shift a board, and safety lines cost little compared with a lost or damaged board.
Can a rack pad scratch my board?
Yes, if grit gets trapped between the pad and the board. Wipe pads and the board’s underside before loading, and replace pads that are compressed, cracked, or embedded with sand.
What is the best way to protect a paddle board on a gravel road?
Use a padded board sock or travel bag to shield the deck and rails from flying stones. Drive slowly, and avoid following close behind trucks that kick up debris.
The Bottom Line
Transporting a paddle board isn’t complicated once you match the method to your vehicle: a roof rack with cam straps and bow/stern lines for hard boards, a padded truck bed setup for pickups, or simply rolling an inflatable into its bag for the most flexible option of all. Whichever route fits your setup, the core rules stay the same — center the load, tighten firm rather than crushing, protect the rails, and double-check everything before you hit highway speed.
Shop Transport Essentials →